Public post-mortems
Explain what happened after an incident, on the status page your customers already check.
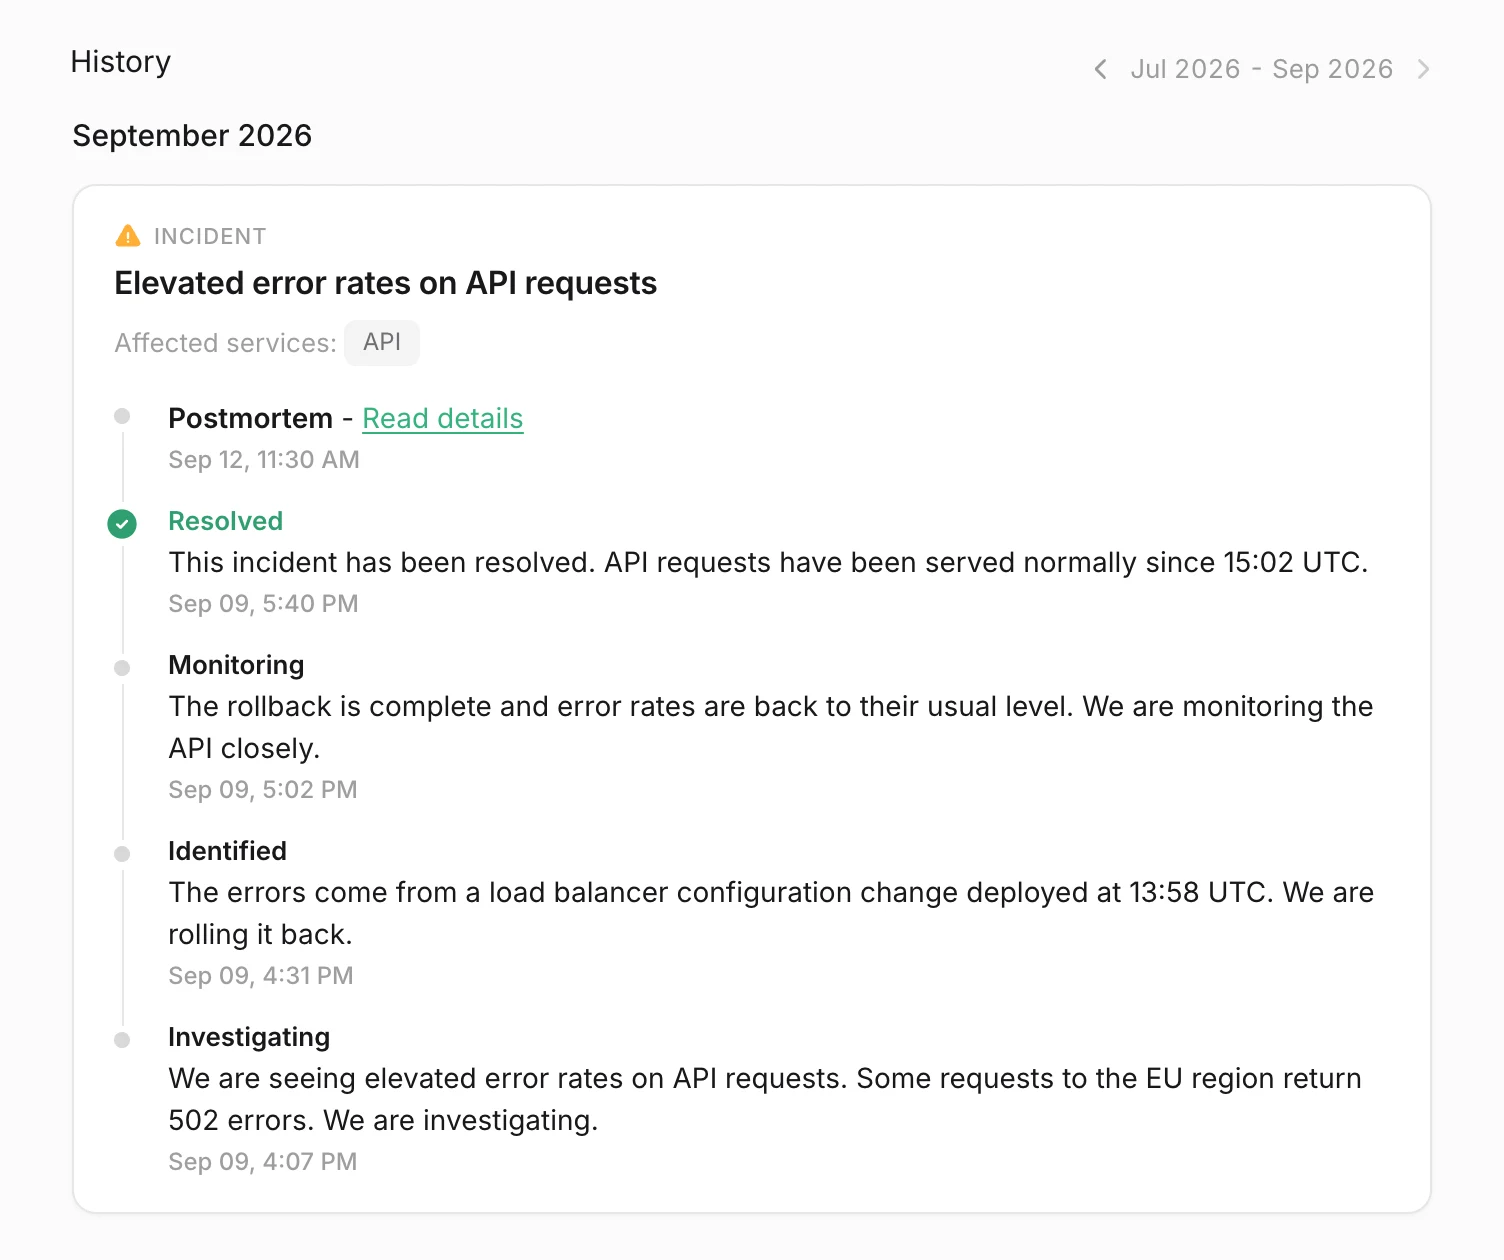
Once an incident is resolved, you can attach a written post-mortem to it. It appears at the top of the incident on your status page, above the updates you posted during the outage. Visitors see a Postmortem - Read details line in your incident history and the full text on the incident page. You write it in the dashboard, keep it as a draft while your team reviews it, and publish it when it is ready.
- Tell customers what caused an outage and what you changed so it does not happen again.
- Answer the "what happened yesterday?" emails with a single link.
- Give security reviewers and enterprise buyers a public record of how you handle incidents.
Key terms used in this article
- Public post-mortem: the write-up you publish on the status page, attached to a status page incident.
- Internal post-mortem: the write-up on the Post-Mortem tab of an alerting incident, under Incidents. It stays in the dashboard and never reaches your status page.
- Draft: a post-mortem that is saved but not published. Only your team can see it.
See the Glossary for a full list of terms.
Write and publish a post-mortem
Go to Status PagesUpdatesChoose an incident to open the incident you want to explain.
- Open a resolved incident
Once the latest update of an incident is Resolved, a Public post-mortem block appears at the top of its timeline. To start one before the incident is resolved, open the ... menu next to the incident title and select Write post-mortem.
- Click Write post-mortem
The editor opens with a template: Summary, Impact, Root cause, Resolution, and What we are changing. Replace each section with your own text, or delete the ones you do not need.
- Write each language
On a multi-language status page, the editor has one tab per language. A language you leave empty shows the text of the page's default language.
- Save a draft or publish
Click Save draft to keep working on it without showing it to visitors, or Publish to add it to every status page the incident is published on.
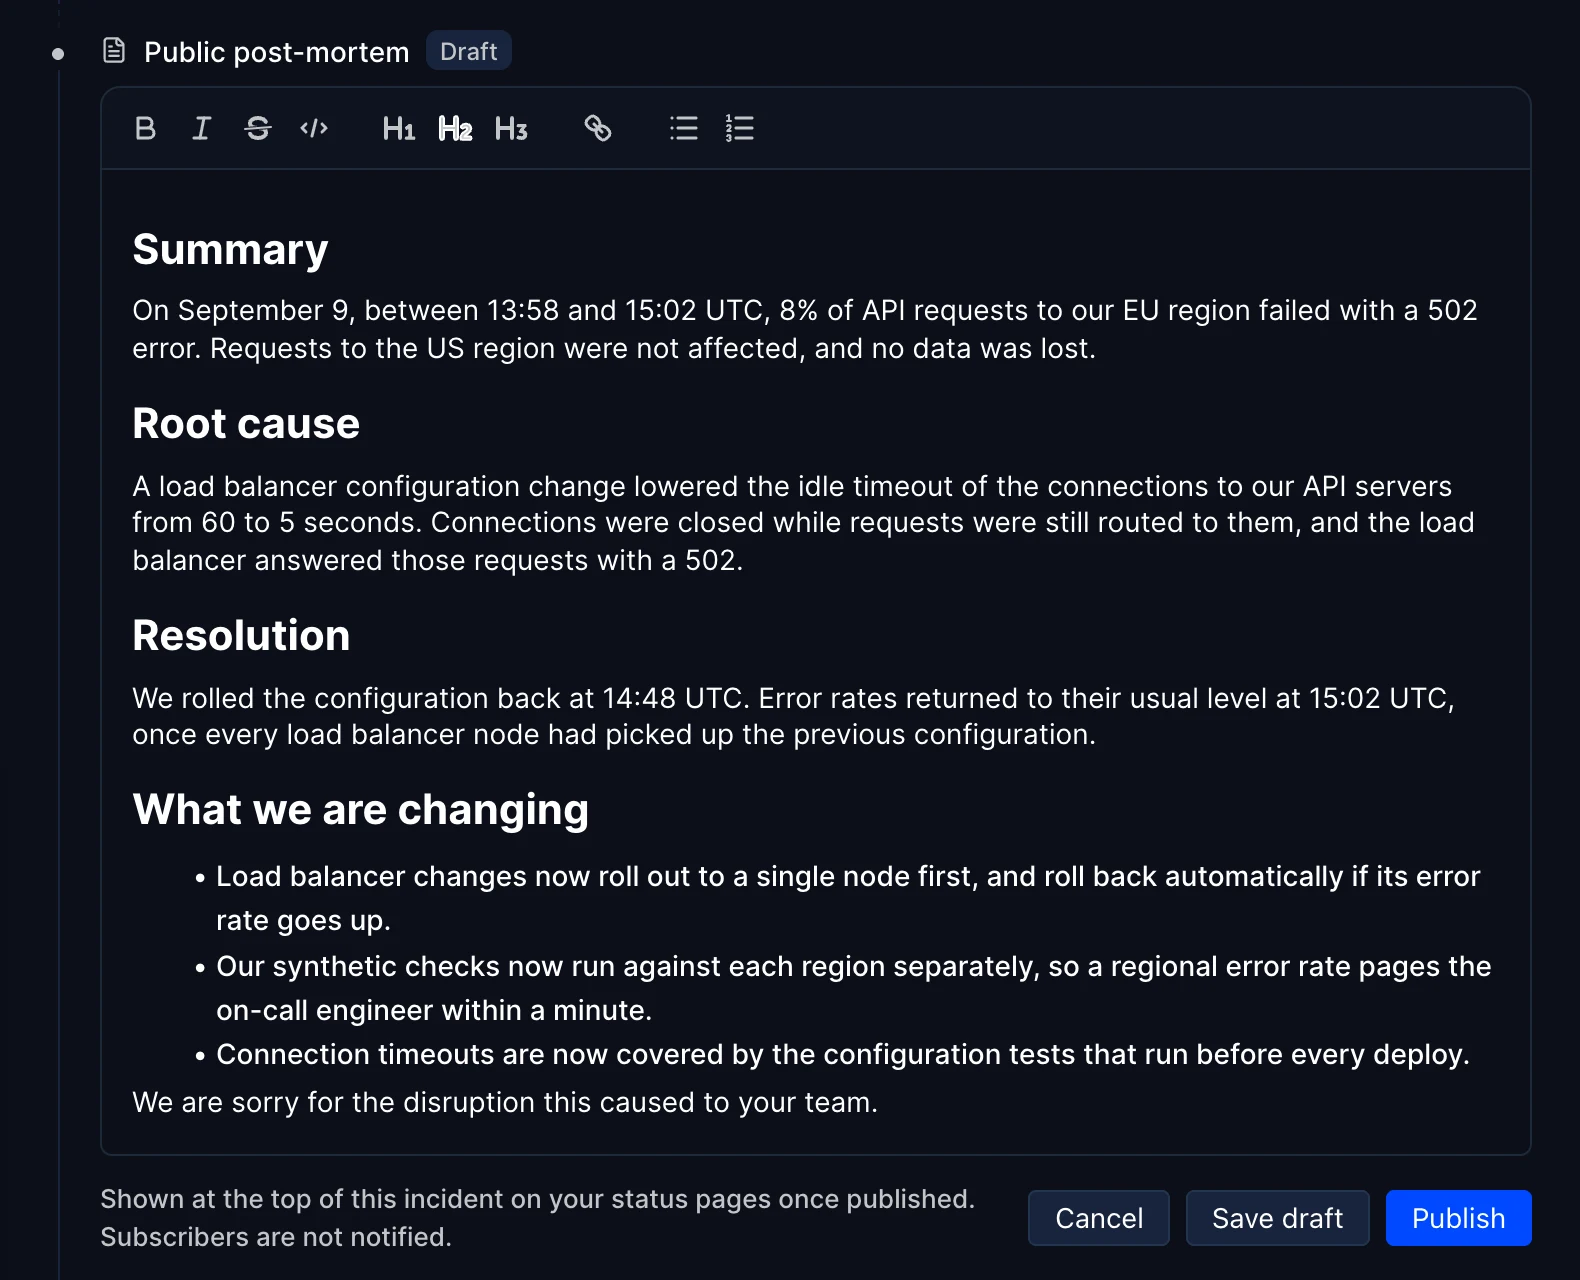
The editor supports headings, bold, italic, strikethrough, inline code, links, and bulleted or numbered lists. Anything else, such as scripts, embedded frames, or inline styles, is removed when you save.
Start from your internal post-mortem
If the status page incident was published from an alerting incident that already has an internal post-mortem, the block offers a second button: Start from internal post-mortem. It copies the internal text into the editor so you do not start from a blank page.
Read it through before you publish. The internal version was written for your team: it usually names people, internal systems, and action items that customers do not need to see. The public version works best when it covers what customers experienced, the cause in plain language, and what you changed.
The post-mortem template playbook covers how to run the internal review itself.
What visitors see
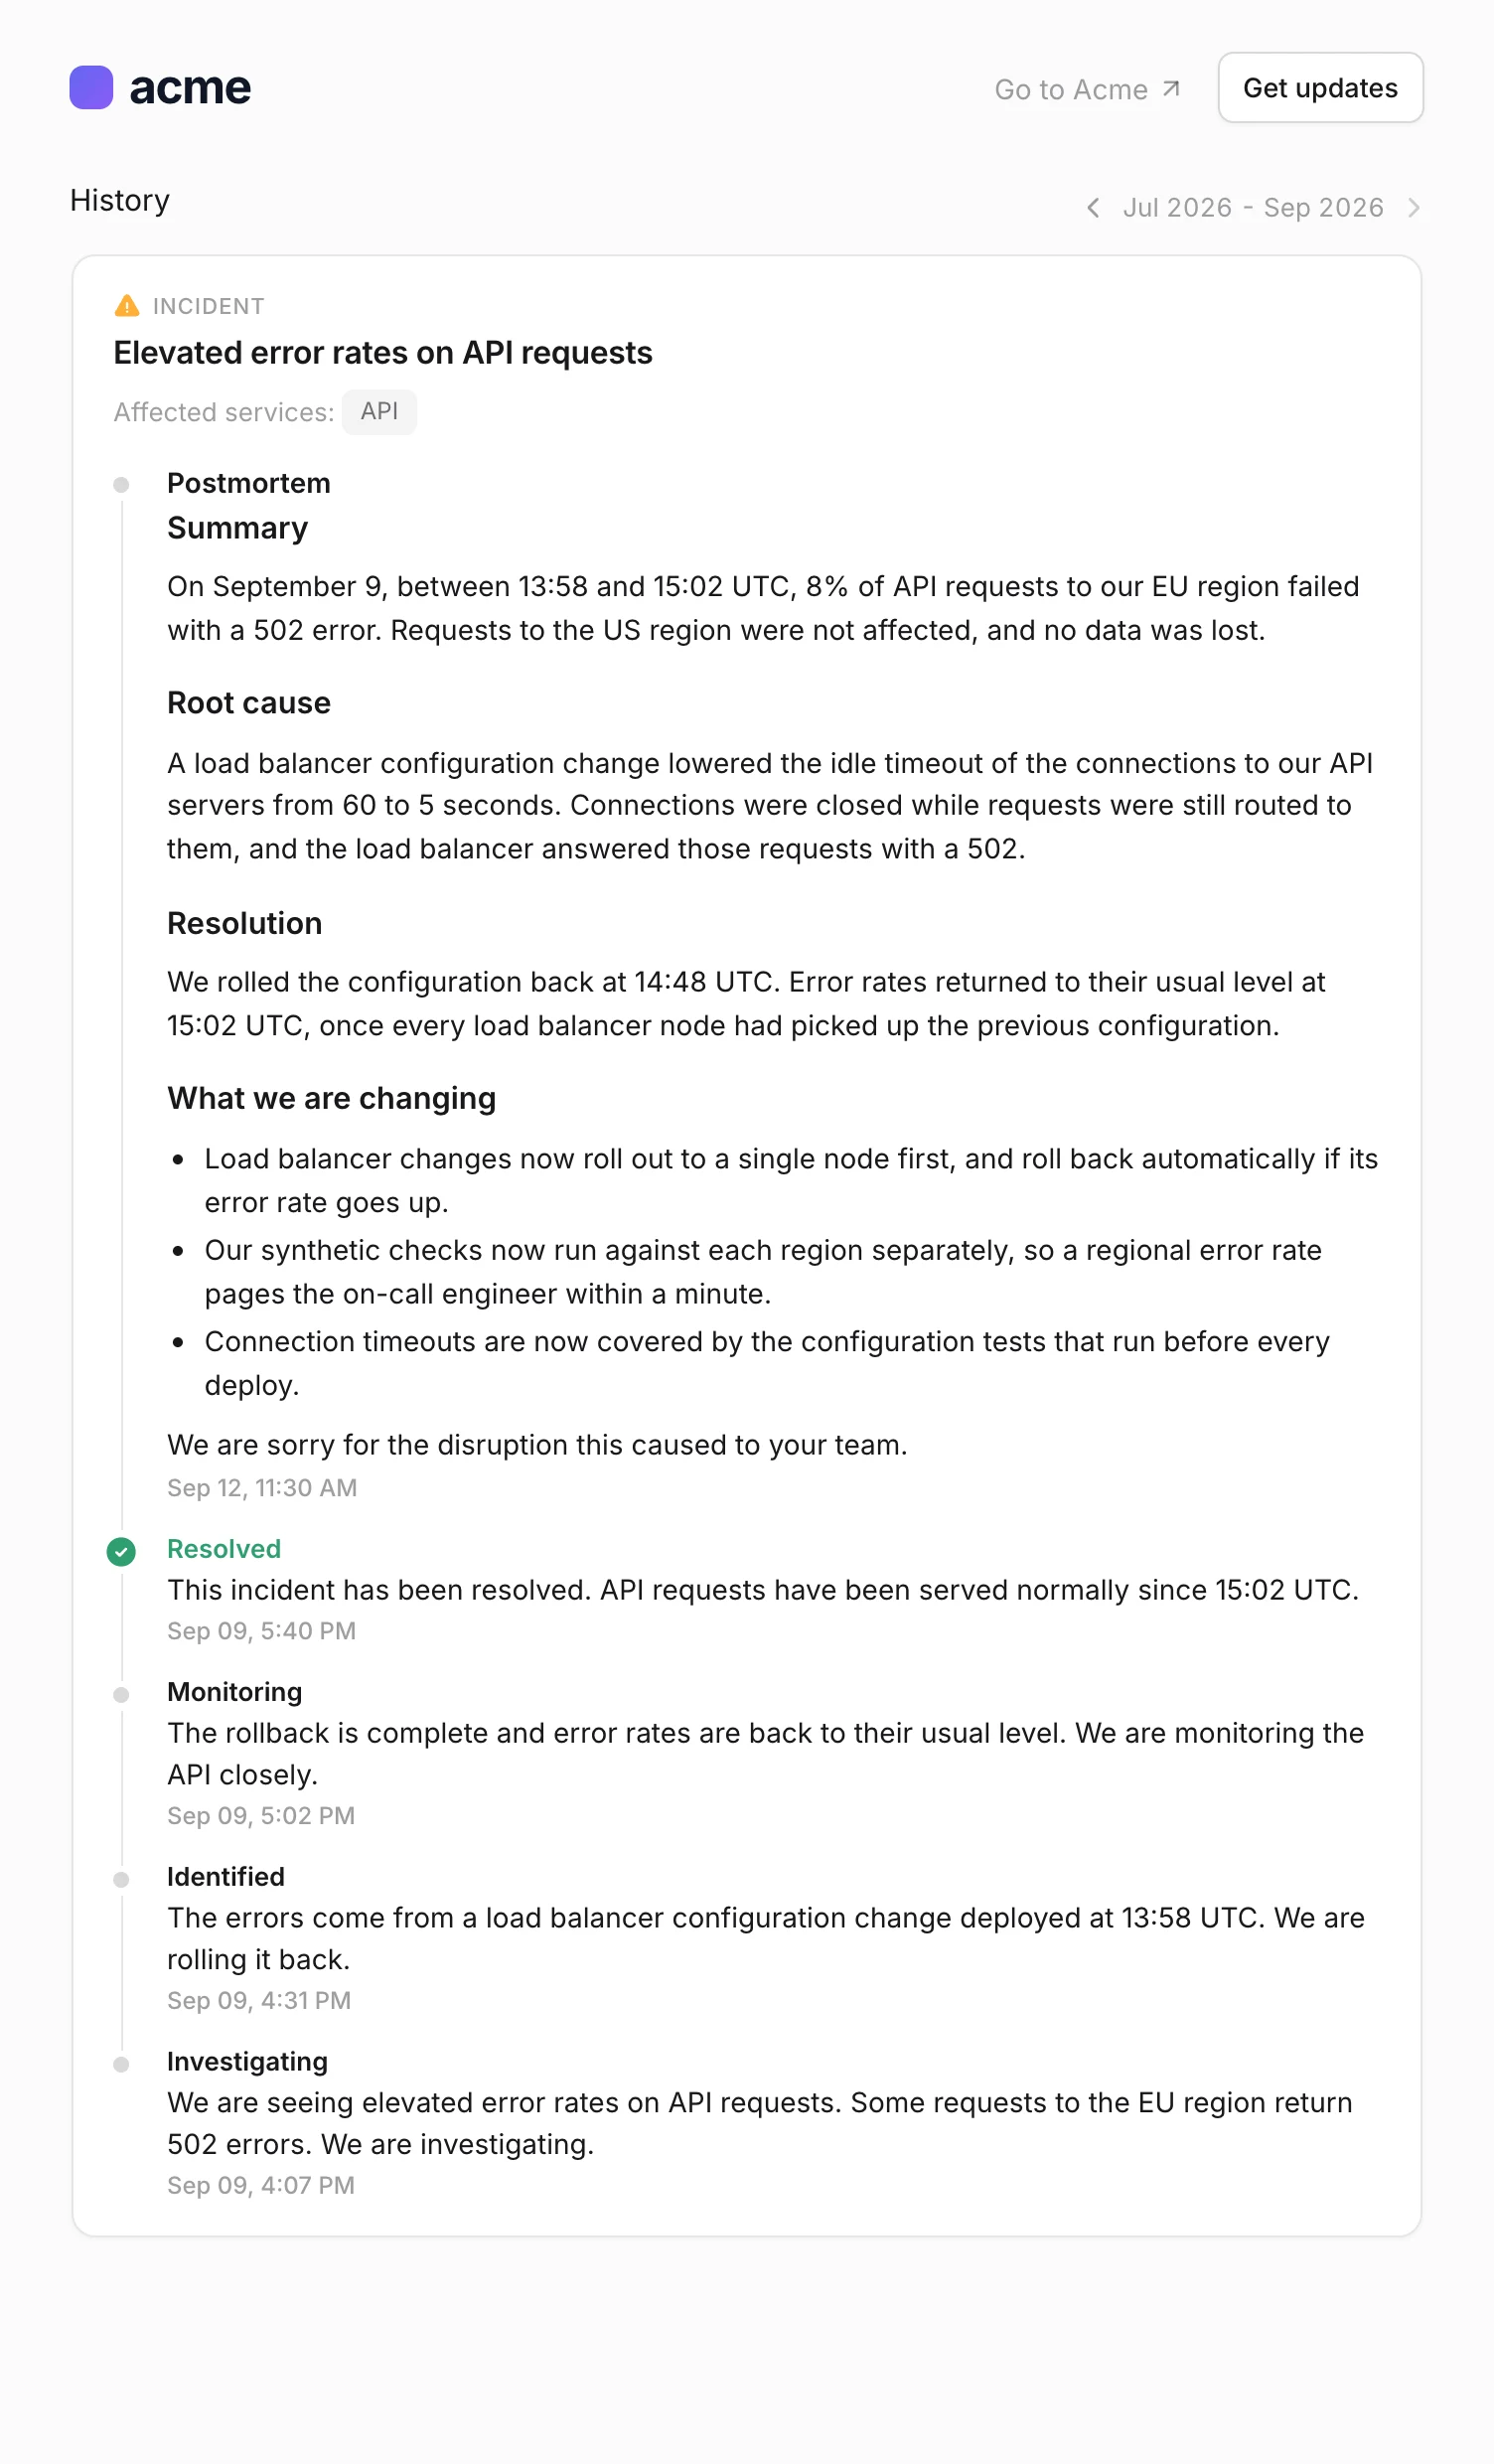
A published post-mortem is the newest entry of the incident timeline, dated with its publication date:
- In the incident history and the recent incidents on your home page, the entry reads Postmortem - Read details. Clicking it opens the incident page.
- On the incident page, the entry shows the full post-mortem. You can link to it directly by adding
#postmortemto the incident URL.
The labels follow the visitor's language on multi-language pages.
Edit, unpublish, or delete
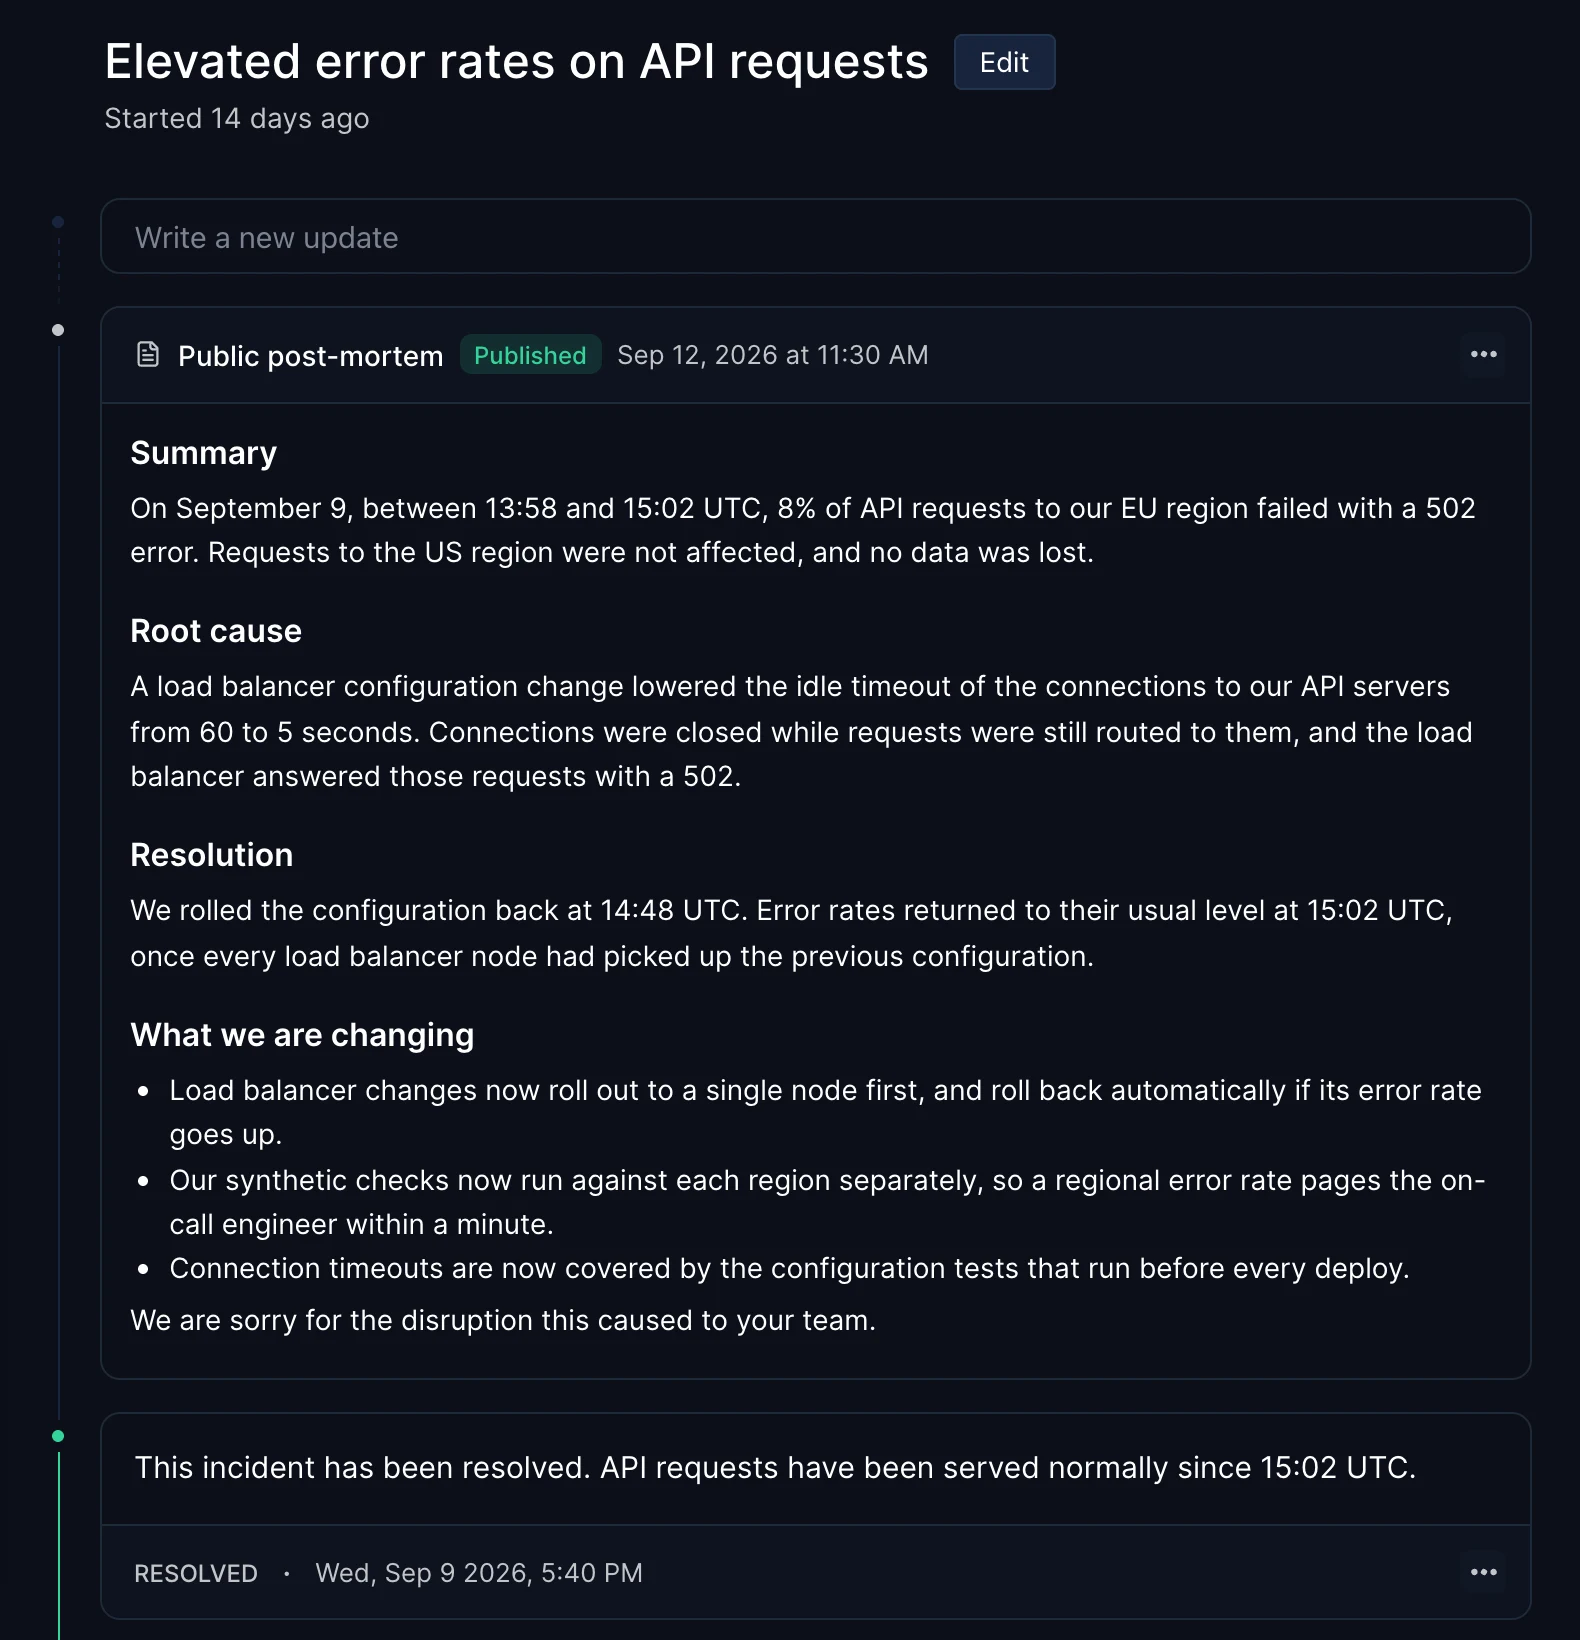
Once saved, the post-mortem shows in the incident timeline of the dashboard with a Draft or Published label. Open its ... menu to change it:
| Action | What happens on your status page |
|---|---|
| Edit | A published post-mortem is updated as soon as you click Save. It keeps its original publication date, so fixing a typo does not move it. |
| Publish | The draft appears on every status page the incident is published on. |
| Unpublish | The post-mortem is removed from the status page and kept as a draft. |
| Delete | The post-mortem is removed from the status page and from the dashboard. This cannot be undone. |
On the alerting incident, the Post-Mortem tab shows whether the public version is written, in draft, or published, with a link to it.
Examples
- Two days after a regional API outage, a SaaS team publishes the root cause and its new deploy safeguards, then links the post-mortem in its reply to every customer who opened a ticket.
- After a payment provider failure, an e-commerce team explains how it failed over and what it will do next time, so customers know the problem is handled.
- A company whose status page is in English and French writes both versions in the same editor and publishes them together.
Troubleshooting
The post-mortem does not show on my status page
Check that it is published: a draft only shows in the dashboard. Then check that the incident is published on that status page, in the Status pages list of the incident. Status pages refresh within a few seconds of publishing.
The Write post-mortem button is missing
The block appears once the latest update of the incident is Resolved. Before that, use Write post-mortem in the ... menu next to the incident title.
Do subscribers get notified when I publish?
No. Publishing a post-mortem does not send email, SMS, Slack, or Teams notifications. To notify subscribers, post an Update on the incident with a short summary and a link to the post-mortem.
Can I publish a post-mortem through the API?
Not yet. The Incidents API manages incidents and their updates. Post-mortems are written in the dashboard.