Status banner
Show a banner on your website, app or help center while an incident or a maintenance is ongoing. You paste one script tag, and the banner appears and disappears on its own as your status page changes.
Overview
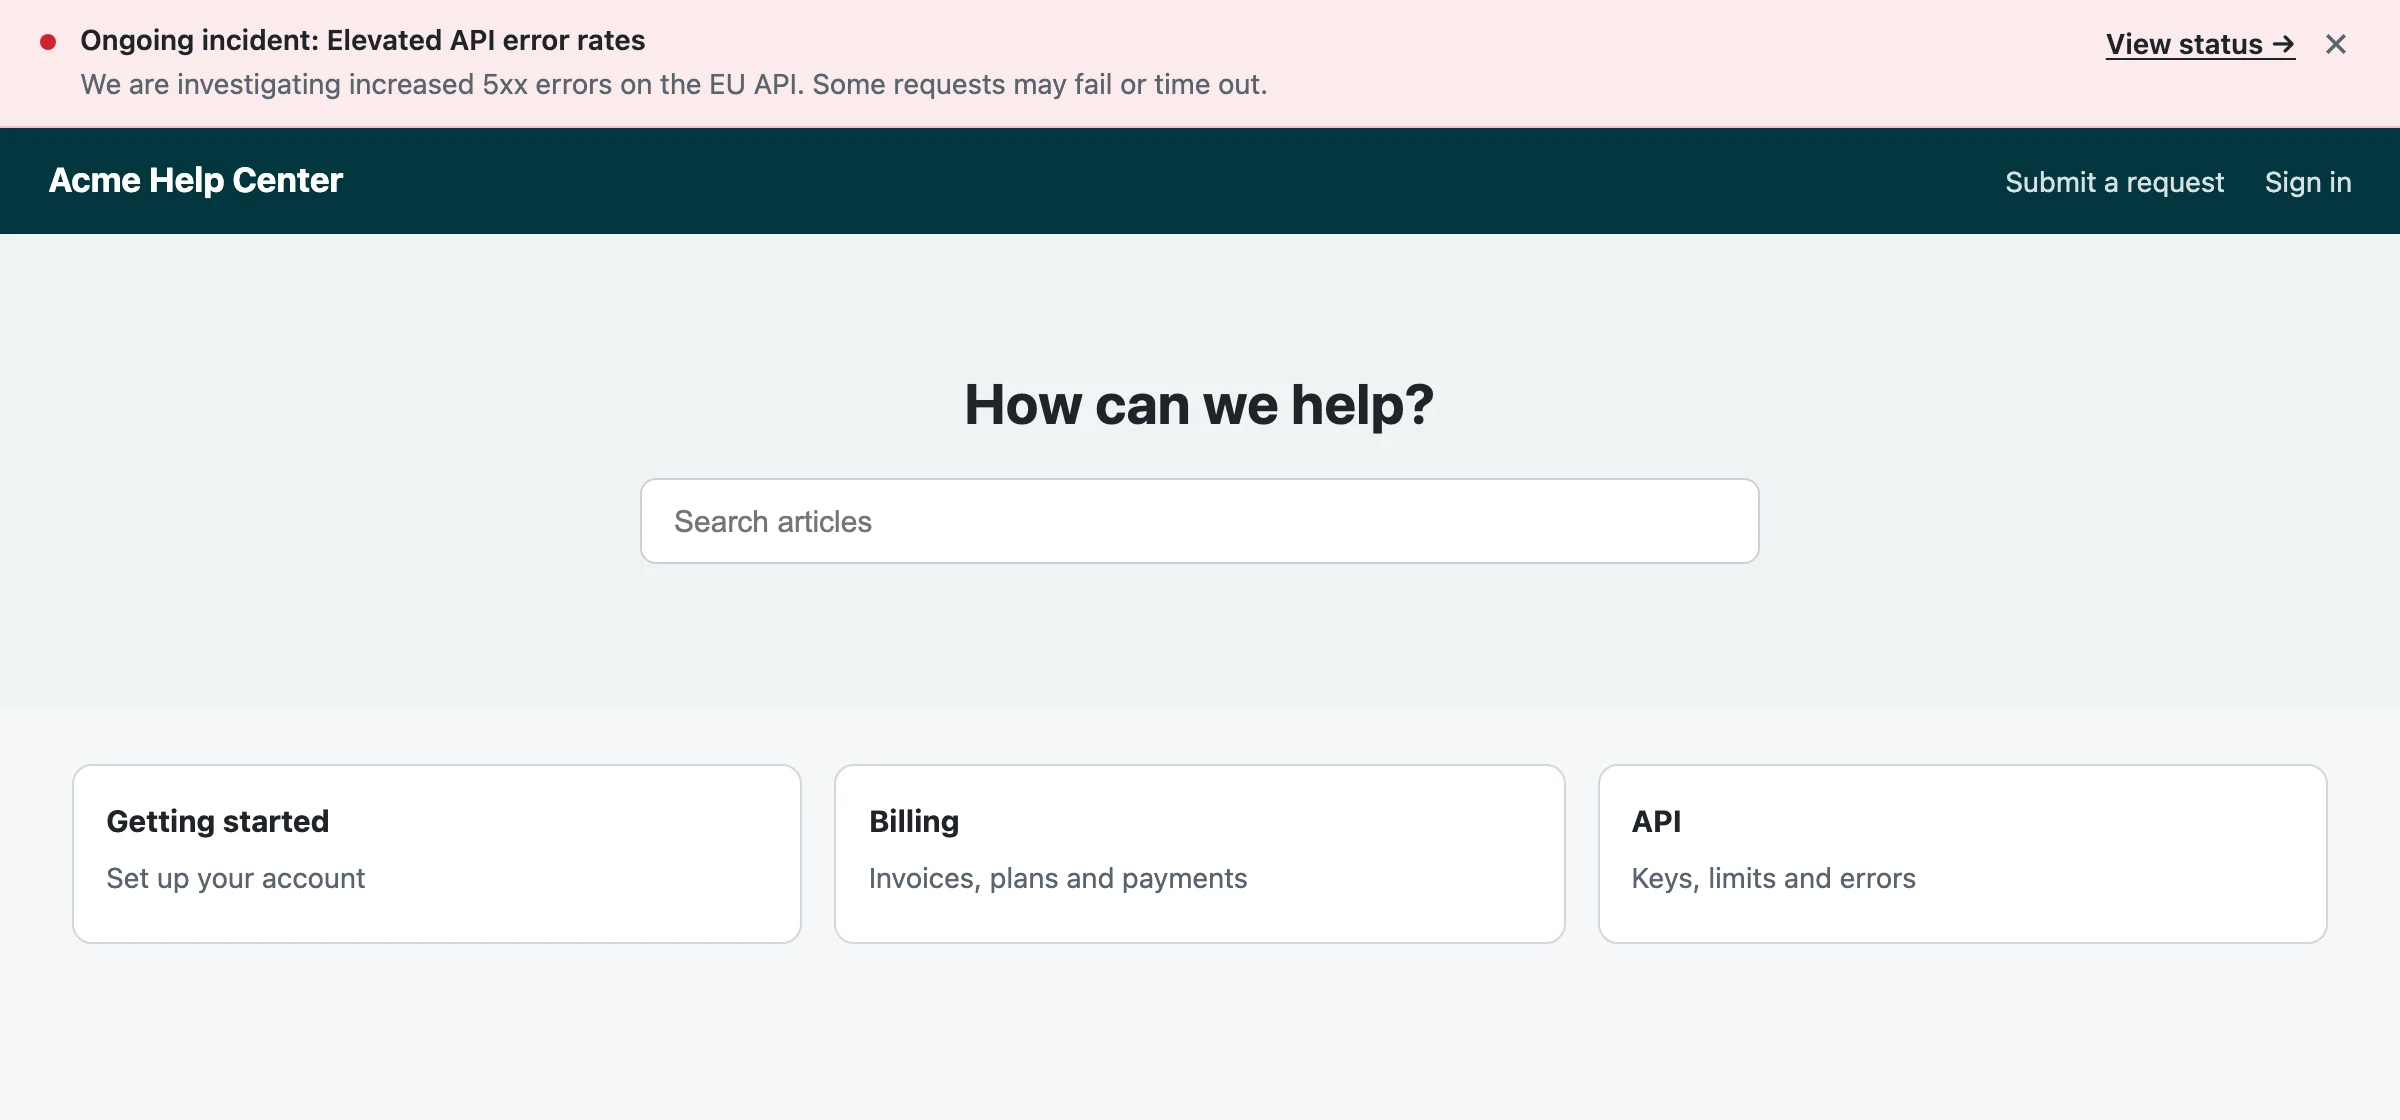
The status banner follows one of your Hyperping status pages. While that page has an ongoing incident, an outage or a maintenance, visitors of your site see a short bar with the title, the latest update and a link to the status page. The rest of the time, nothing is rendered.
Customers learn about a problem on the page they are already using, and fewer of them open a ticket to ask whether something is down.
- Warn visitors of your help center before they submit a request about an ongoing incident.
- Tell logged-in users of your web app that a maintenance is in progress, or that one starts in the next 24 hours.
- Show "All systems operational" in the footer of your marketing site or on your login page.
The script works on any site where you can add a <script> tag: a marketing site, a web app, a docs portal, or a help center built with Zendesk Guide, Intercom, Help Scout, Webflow, WordPress, Framer or Next.js. It has no dependencies and sets no cookies.
Prerequisites
- A paid Hyperping plan. On the free plan, the Status banner card shows a Pro tag.
- A status page that is public. Protected status pages never show a banner (see Privacy and protected status pages).
- Access to the HTML of your site, or to the theme code of your help center.
How to set up the status banner
- Create the integration
Go to IntegrationsStatus banner
The Status banner card is in the Status page section. Give the integration a Name (it defaults to "Status banner"), pick the Status page the banner follows, then click Create.
Each integration follows one status page. If you run several products with their own status pages, create one integration per page.
- Choose how it looks
Under Choose how it looks, pick the options below. The Preview uses sample data, and its Incident, Maintenance and Operational tabs show each state with your settings.
- Placement: Top of the page, or Inside an element to render the banner in a container of your page. The Element (CSS selector) field defaults to
#hyperping-status. - Theme: Light, Dark, or Follow the visitor to match the light or dark setting of their device.
- Turn on Also show "All systems operational" when nothing is going on if the banner has a fixed spot on your page, such as a footer.
- Placement: Top of the page, or Inside an element to render the banner in a container of your page. The Element (CSS selector) field defaults to
- Paste the snippet on your site
Under Paste the snippet on your site, click Copy snippet. With the default settings, it looks like this:
<script src="https://api.hyperping.io/v1/status-banner.js?key=int_XXXXXXXX" async></script>Paste it in the
<head>, or just before</body>, of every page where the banner should appear. If your site uses a shared layout or theme file, adding it there once covers every page.The
keyis the integration ID shown in the dashboard. It is not a secret: it only gives access to what your public status page already shows. - Check it is live
Open a page of your site that has the snippet. Under Check it is live, the integration page lists each site hostname the banner was loaded from, with the time it was last loaded. Until the first visit, it shows Waiting for the first visit.
The banner stays hidden while everything is operational, so seeing no banner at this point is expected. To see it, turn on "All systems operational" for a moment or wait for your next maintenance.
Banner states
The banner shows the most important thing happening on the status page it follows:
| Label | Shown | Colour |
|---|---|---|
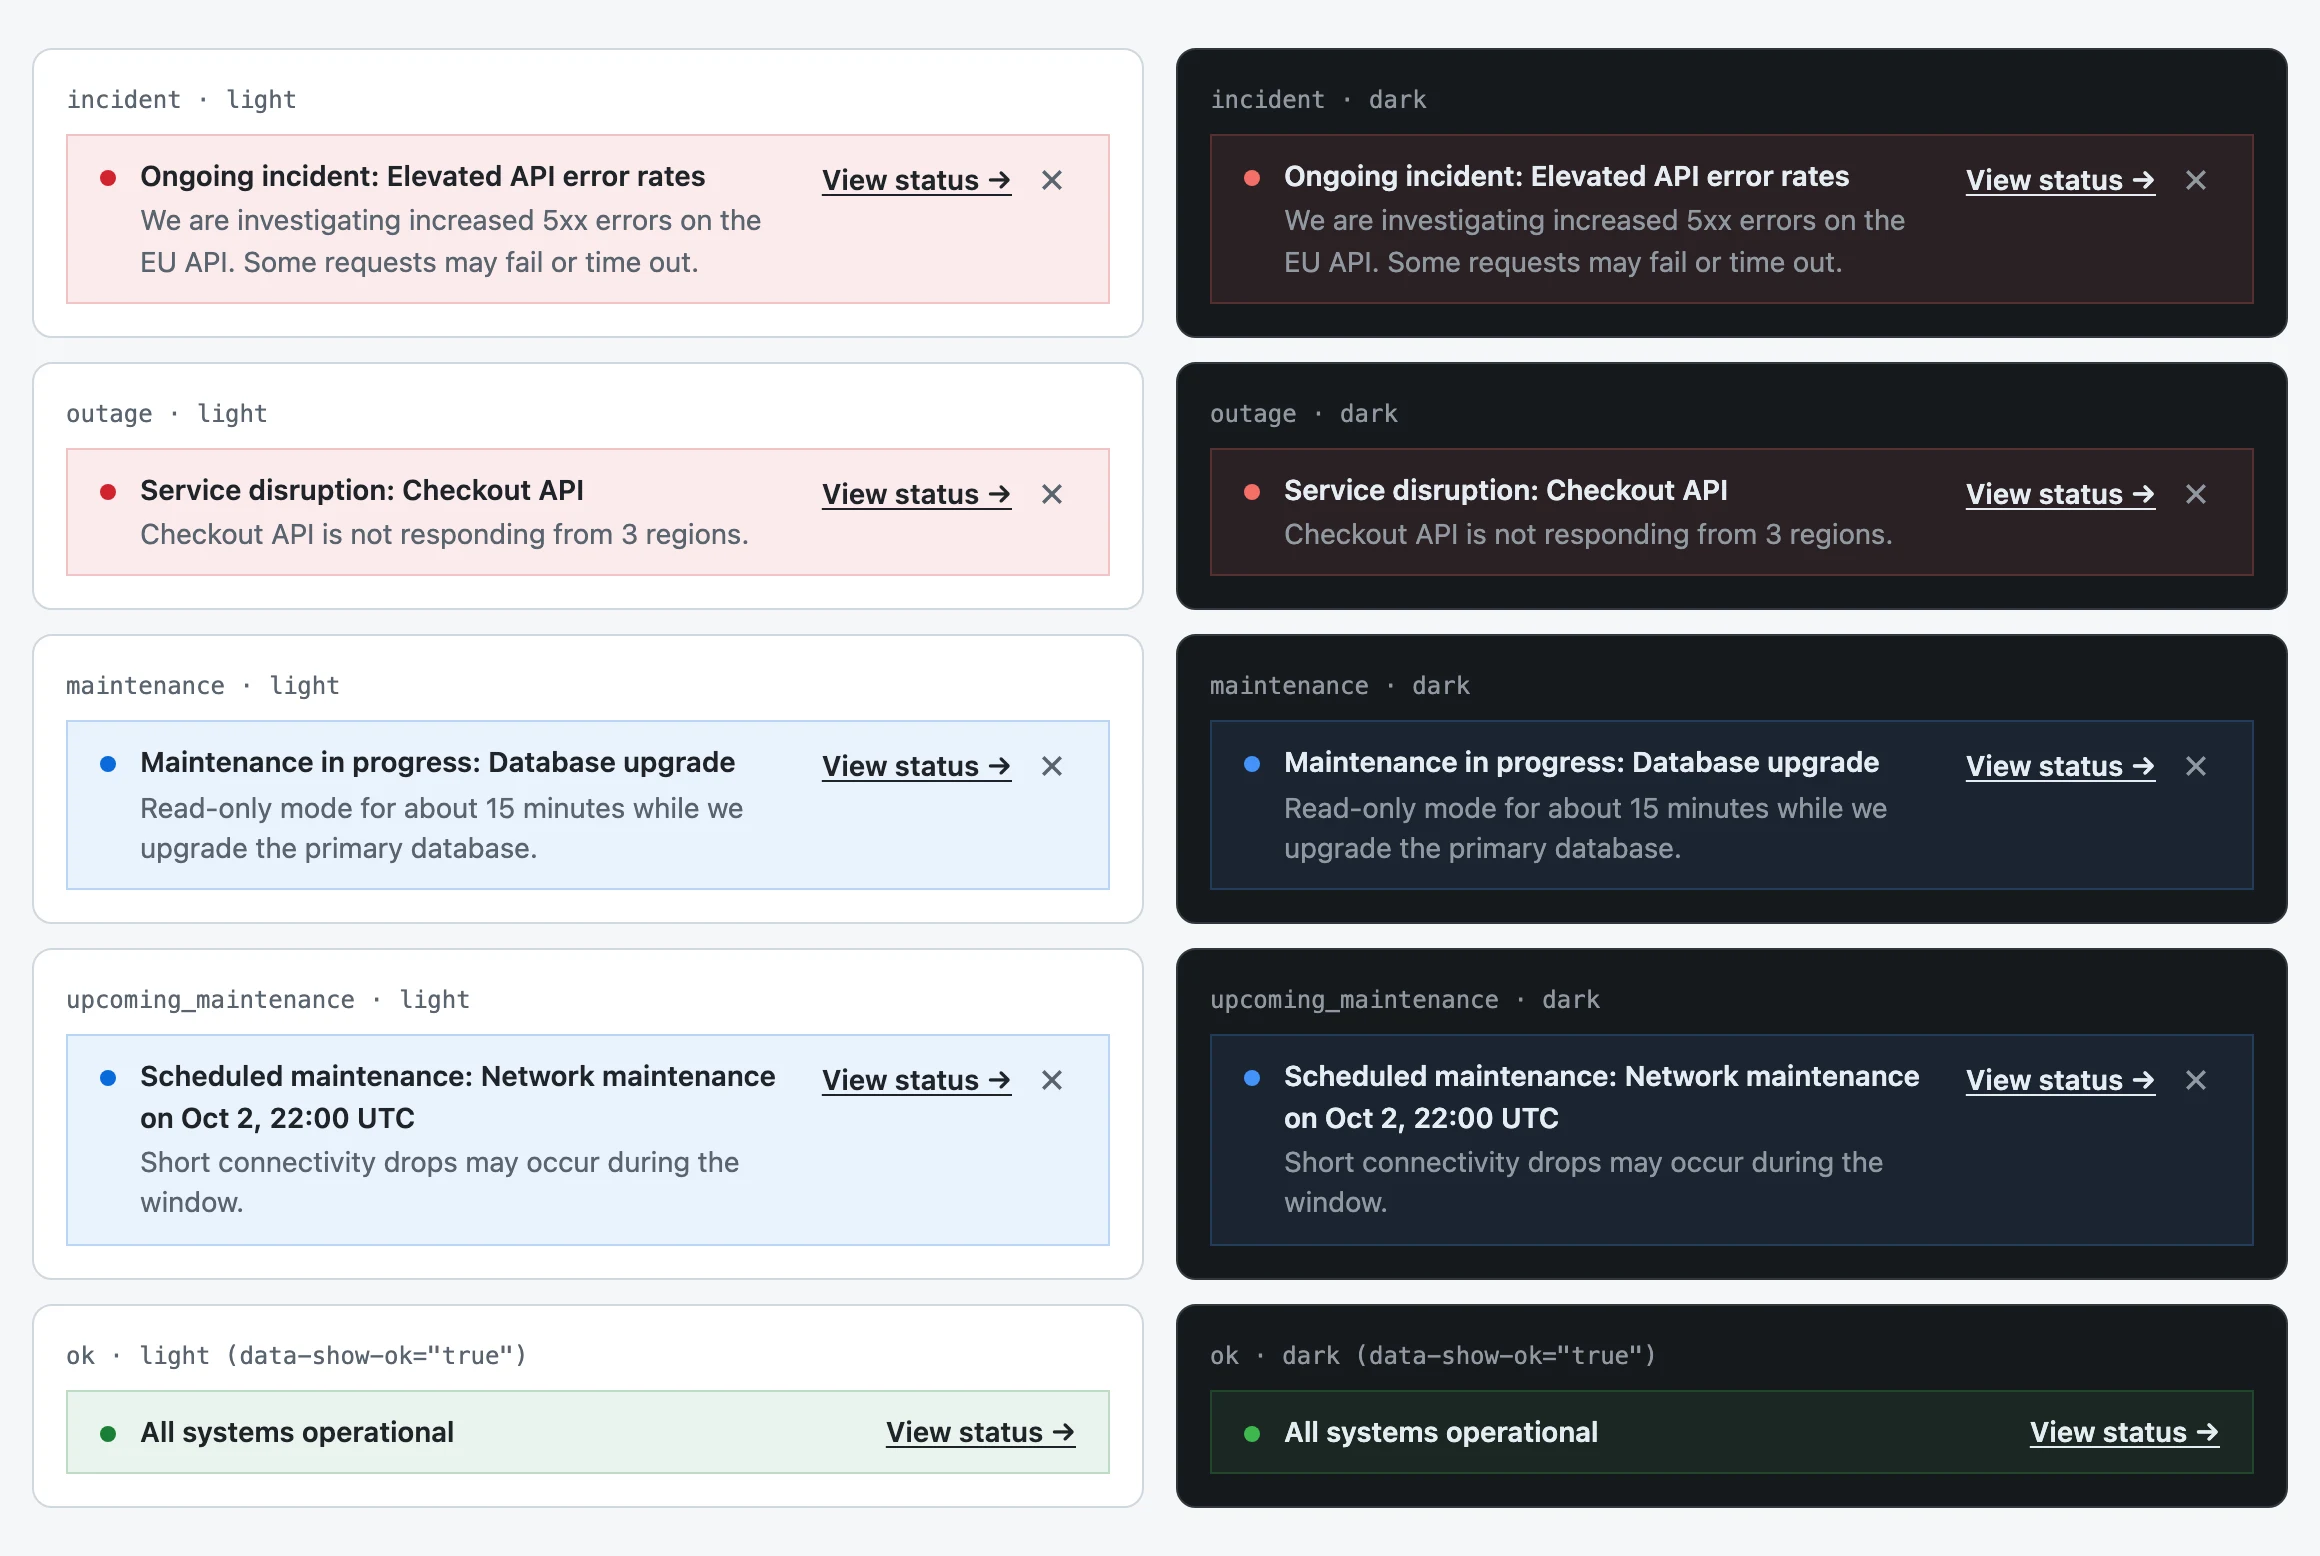
| Ongoing incident | While an incident is open on the status page. | Red |
| Service disruption | While monitors shown on the status page are down. | Red |
| Maintenance in progress | During a maintenance window. | Blue |
| Scheduled maintenance | During the 24 hours before a maintenance starts. | Blue |
| All systems operational | Only with data-show-ok="true", when none of the above applies. | Green |
Each banner shows the label and the incident or maintenance title in bold, then the latest update as plain text, cut after 2 lines. The View status link opens your status page. On v2 status pages, it opens the page of the incident itself. Visitors can close the banner with the × button.
Script options
The dashboard adds these attributes to the <script> tag for you when you change the settings. You can also edit them by hand:
| Attribute | Description | Default |
|---|---|---|
data-target | CSS selector of the element to render the banner in, instead of the top of the page. | Top of the page |
data-theme | dark, or auto to follow the visitor's system setting (prefers-color-scheme). | light |
data-show-ok | Set to true to also show "All systems operational". Useful with data-target. | false |
data-key | The integration ID, if you prefer it to the ?key= parameter in the URL. |
With Inside an element and the default selector, the dashboard adds the container above the script. This example also shows "All systems operational", which suits a footer or a login page:
<div id="hyperping-status"></div>
<script src="https://api.hyperping.io/v1/status-banner.js?key=int_XXXXXXXX" data-target="#hyperping-status" data-show-ok="true" async></script>
At the top of the page, the banner is a full-width tinted bar. Inside an element, it is a bordered box. Below 600px wide, the View status link and the close button move under the text.
Refresh, dismiss and language
- The banner checks for changes every minute, and skips the check while the browser tab is hidden. Hyperping caches the status for about 30 seconds, so a new incident or update reaches your site within a minute or two.
- A visitor who closes the banner doesn't see it again for the rest of their browser session. It comes back if the state or the title changes, for example when a new incident starts or the incident is renamed.
- Labels follow the
langattribute of your page's<html>tag, then the visitor's browser language. English, French, German, Spanish and Dutch are available, and other languages fall back to English. Titles and messages appear as written on your status page. - The banner renders in a Shadow DOM. Your site's CSS can't change its look, and its styles can't leak into your site.
Add the banner to a Zendesk Help Center
In Zendesk, open Knowledge admin and go to Customize design. Click Customize on your live theme, then Edit code. Open document_head.hbs, paste the snippet and save.
The Zendesk integration adds the same banner as part of its Help Center step, together with a status panel in the ticket sidebar. If you only need the banner, the Status banner integration is enough.
Privacy and protected status pages
- The banner shows the same information to anyone who visits your site: what your public status page already shows.
- Private status pages, and status pages protected by a password or SSO, never show a banner, since the site that embeds it is public.
- The script sets no cookies. Dismissals are kept in the visitor's browser for the current session only.
Build your own banner
To build your own UI, read the data the banner uses from its public endpoint. It returns JSON and allows requests from any origin (CORS).
curl https://api.hyperping.io/v1/status-banner/int_XXXXXXXX| Field | Description |
|---|---|
state | ok, incident, outage, maintenance or upcoming_maintenance. |
title | Title of the incident or maintenance. |
message | Latest update, as plain text. |
url | Link used by View status. |
statusPage | Object with the name and url of the status page. |
startsAt, endsAt | Start and end of the incident or maintenance, when known. |
updatedAt | Time of the latest update. |
The endpoint returns a 403 error for protected status pages. For the full list of incidents and scheduled maintenances, use the status page public API.
Troubleshooting
The banner doesn't appear
- The banner is hidden while everything is operational. Add
data-show-ok="true"to the script tag to check that it loads, or test during a maintenance. - Check that the snippet is in the HTML of the page you are looking at. On a help center, make sure the theme you edited is the live one.
- Check that the status page is not protected. Protected status pages never show a banner.
- If your site sends a Content Security Policy, allow
https://api.hyperping.ioinscript-srcandconnect-src. The banner's styles sit in a<style>tag inside its Shadow DOM, so astyle-srcthat blocks inline styles shows it unstyled: add'unsafe-inline'tostyle-src, next to the sources you already allow.
script-src https://api.hyperping.io;
connect-src https://api.hyperping.io;
style-src 'unsafe-inline';
The banner disappeared after I closed it
Closing the banner hides it for the rest of the browser session. Open the page in a new private window to see it again. It also comes back on its own when the state or the title changes.
The banner shows at the top of the page instead of inside my element
The element matching data-target must exist when the script runs. If it doesn't, the banner falls back to the top of the page. Place the container before the script tag in your HTML, and check that the selector matches it (#hyperping-status for an element with id="hyperping-status").