Chapter 4 of 20Browse the complete guide
Playwright Locators: The Complete Guide
Learn how Playwright locators work, when to use getByRole, getByLabel, and getByTestId, and why user-facing locators outlast brittle CSS and XPath selectors.
What a locator actually is
A locator is a stored description of how to find an element on the page, rather than a reference to the element itself.
const submitButton = page.getByRole('button', { name: 'Submit' });This line does not touch the page. No search happens, no error is thrown if the button does not exist yet. Playwright stores the description and resolves it later, at the moment you act on it:
await submitButton.click();Only now does Playwright query the page. And it does not query once. It retries until the element appears, is visible, is stable, and can receive the click, or until the timeout expires. This lazy evaluation is the foundation of Playwright's auto-waiting behavior: because the locator re-resolves on every action, your test survives re-renders, hydration, and elements that mount late.
The same mechanism powers web-first assertions, which re-run the locator until the expected condition holds. Understanding this changes how you write tests. You can create locators up front, store them in variables, reuse them across a test, and trust that each use reflects the current state of the page.
The recommended built-in locators
Playwright ships a small set of locators that find elements the way a user would: by role, by label, by visible text. Use them in roughly this order.
getByRole: the workhorse
getByRole finds elements through the accessibility tree, the same structure screen readers use. Buttons, links, headings, checkboxes, and form controls all expose a role, and most of the time an accessible name too.
<button>Sign in</button>await page.getByRole('button', { name: 'Sign in' }).click();The name option matches the accessible name: the visible text of a button, the text of a link, the label of an input. It accepts a string or a regex, and matching is case-insensitive and trims whitespace by default. Pass exact: true when you need a strict match.
<h2>Order summary</h2>
<a href="/settings">Account settings</a>
<input type="checkbox" id="terms" /><label for="terms">I agree</label>
await expect(page.getByRole('heading', { name: 'Order summary' })).toBeVisible();
await page.getByRole('link', { name: 'Account settings' }).click();
await page.getByRole('checkbox', { name: 'I agree' }).check();Reach for getByRole first. It reads like a sentence, it targets what the user perceives, and as a side effect it fails when your markup is inaccessible, which is a bug worth catching anyway.
getByLabel: form fields
getByLabel finds form controls by their associated label text. It handles <label for>, wrapping labels, and aria-label.
<label for="email">Email address</label>
<input id="email" type="email" />
await page.getByLabel('Email address').fill('qa@example.test');This is the best way to fill forms. If the label and the input become disconnected, the locator fails, and that failure mirrors what a screen reader user would experience.
getByPlaceholder
For inputs that only have placeholder text and no label:
<input placeholder="name@example.com" />await page.getByPlaceholder('name@example.com').fill('qa@example.test');Placeholders are a weaker anchor than labels because designers change them freely. Use this one when no label exists.
getByText: non-interactive content
getByText finds elements by the text they render. It is the right choice for divs, spans, and paragraphs that a user identifies by reading.
<span>Payment confirmed</span>await expect(page.getByText('Payment confirmed')).toBeVisible();Matching is substring-based and case-insensitive by default; pass a regex or exact: true to tighten it. Do not use getByText for buttons and links. Those have roles, and getByRole with a name is more precise.
getByAltText: images
<img alt="Hyperping dashboard" src="/dashboard.png" />await expect(page.getByAltText('Hyperping dashboard')).toBeVisible();getByTitle
<span title="Open issues">25</span>await expect(page.getByTitle('Open issues')).toHaveText('25');Title attributes are invisible to most users, so treat this as a niche option for the few components that rely on them.
getByTestId: when semantics are missing
Sometimes an element has no role, no label, and text that changes with every content edit. For those cases, add a data-testid attribute and target it directly:
<div data-testid="cart-total">$42.00</div>await expect(page.getByTestId('cart-total')).toHaveText('$42.00');Test ids are stable by contract: they exist only for testing, so nobody should change them casually. The tradeoff is that they test nothing about the user experience. A button can be invisible, mislabeled, and broken for screen readers while its test id still resolves.
If your codebase uses a different attribute, configure it once:
// playwright.config.ts
export default defineConfig({
  use: {
    testIdAttribute: 'data-qa',
  },
});
CSS and XPath are the last resort
page.locator() accepts raw CSS and XPath:
await page.locator('css=button.primary').click();
await page.locator('xpath=//div[@class="modal"]//button[2]').click();
Both work, and both are the most fragile way to find elements. A selector like .col-md-6 > div:nth-child(2) button encodes the exact DOM structure of the page. Rename a class during a refactor, wrap a component in an extra div, reorder two siblings, and the selector breaks even though the page still works for every user. The test fails without telling you anything about your application.
The Playwright team is explicit about this. Their best practices guide says to "prefer user-facing attributes to XPath or CSS selectors" (playwright.dev). When you do need page.locator, keep the selector short and anchored to something meaningful, like an id or a single stable class, rather than a chain of structural hops.
Chaining and filtering
Locators compose. Calling a locator method on another locator searches within it:
const sidebar = page.getByRole('navigation');
await sidebar.getByRole('link', { name: 'Billing' }).click();
For repeated structures like cards or rows, filter() narrows a list down to the one you want. hasText filters by content, has filters by a descendant matching another locator:
const rows = page.getByRole('listitem');

await rows.filter({ hasText: 'Pro plan' })
  .getByRole('button', { name: 'Upgrade' })
  .click();

const rowsWithBadge = rows.filter({ has: page.getByRole('img', { name: 'Verified' }) });
There are also hasNotText and hasNot for exclusion, and you can chain multiple filter() calls.
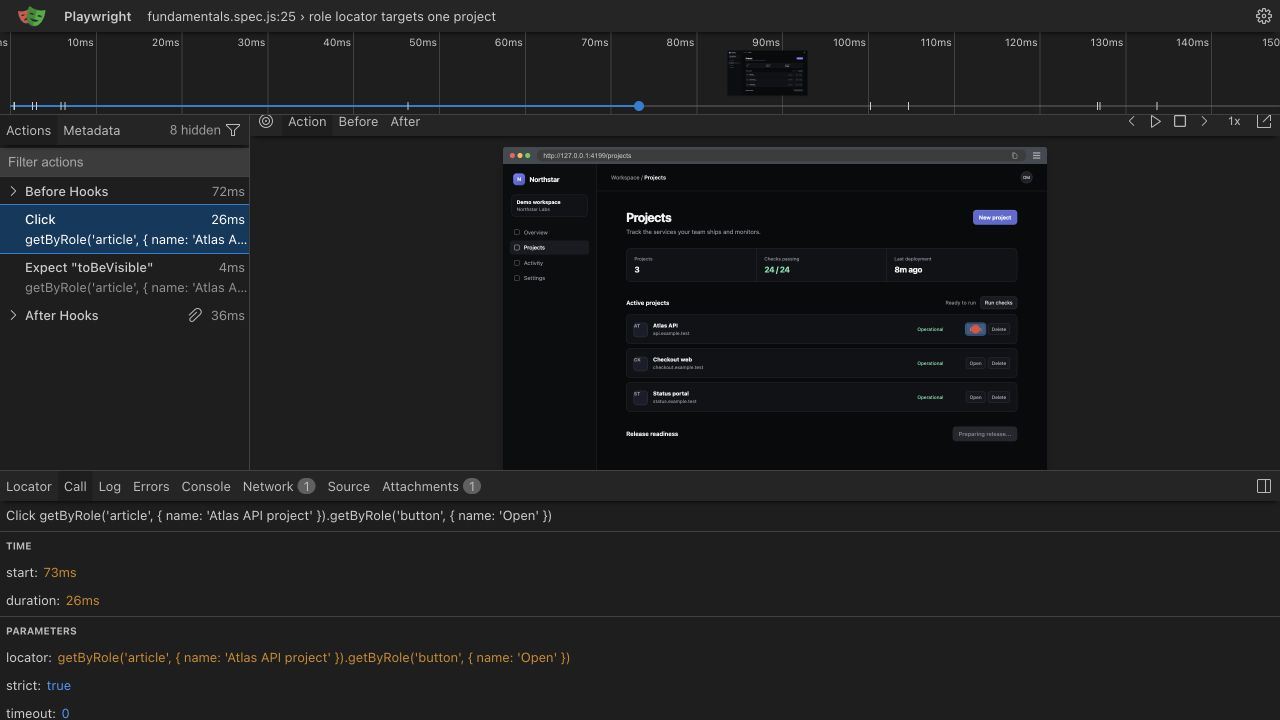
Playwright also offers positional helpers: first(), last(), and nth(index). They are convenient and fragile in equal measure. nth(2) means "whatever happens to be third right now", so a reordered list or an extra item silently shifts your target. Prefer filtering by content, and keep nth() for cases where position is the thing you are testing, like the top result of a sorted table.
Handling strict mode violations
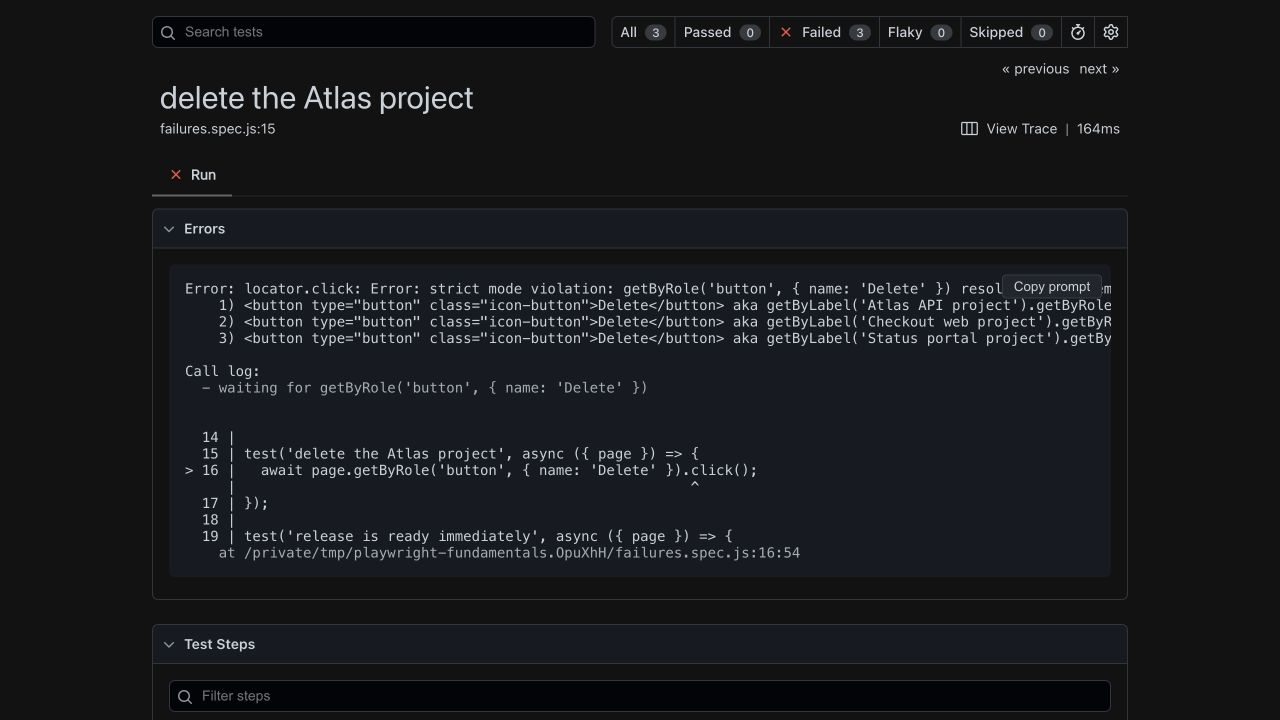
Every Playwright locator is strict: an action or assertion that needs one element throws if the locator resolves to several. The error looks like this:
Error: strict mode violation: getByRole('button', { name: 'Delete' })
resolved to 3 elements
This is a feature. Without strictness, click() would silently pick the first match, and your test might pass while clicking the wrong button. When you hit the error, Playwright lists the matched elements, which usually makes the fix obvious. In order of preference:
- Make the locator more specific, for example by adding or tightening the
nameoption, or usingexact: true. - Scope it under a parent:
page.getByRole('dialog').getByRole('button', { name: 'Delete' }). - Narrow with
filter({ hasText: ... })orfilter({ has: ... }). - Use
first(),last(), ornth()when position genuinely identifies the element.
Note that assertions designed for multiple elements, like toHaveCount, accept multi-element locators without complaint. Strictness only applies where a single element is required.
Working with lists
A locator that matches several elements is how you work with lists. Count them with an assertion:
await expect(page.getByRole('listitem')).toHaveCount(5);Prefer toHaveCount over reading count() manually, because the assertion retries while the list renders. To iterate, use all(), which snapshots the current matches into an array of locators:
for (const row of await page.getByRole('listitem').all()) {
  await expect(row.getByRole('button', { name: 'Details' })).toBeEnabled();
}
One caveat: all() does not wait for anything. It captures whatever is on the page at that instant, so assert on the count first if the list loads asynchronously.
CSS and XPath vs role-based locators
| CSS / XPath | Role-based (getByRole, getByLabel, ...) | |
|---|---|---|
| Survives DOM refactors | No, structure changes break selectors | Yes, as long as the UI stays the same for users |
| Survives styling changes | No, renamed classes break selectors | Yes, styles are irrelevant |
| Survives copy changes | Yes | Only with updated name or text |
| Reflects user experience | No, users do not see the DOM | Yes, matches what users perceive |
| Catches accessibility bugs | No | Yes, unlabeled controls fail to match |
| Readability in test code | Low for long selectors | High, reads like a sentence |
The one scenario where text-based locators lose is heavy copy churn, and getByTestId covers exactly that gap. Between roles for semantics and test ids for the rest, raw CSS should be rare in a healthy suite.
Let codegen pick locators for you
You do not have to derive locators by reading source. Run npx playwright codegen, click through your app, and Playwright records each interaction with the best available locator, preferring roles, labels, and test ids in the same order this guide recommends. It is also a quick way to check what the accessibility tree calls a given element. The codegen guide covers the workflow, and once your locators are in place, the assertions guide shows how to verify what they find.
Run it in production
The locators you write for tests work unchanged in production monitoring. Hyperping Browser Checks run your Playwright scripts on a schedule from multiple regions and alert you when a flow breaks, so the same getByRole calls that guard your CI also catch the signup form failing at 3 AM.