Set up SAML SSO with JumpCloud
Let your team sign in to Hyperping through JumpCloud. You create a custom SSO application in the JumpCloud admin console, copy its metadata URL into Hyperping, and run a test login.
Prerequisites
- A Hyperping Pro or Business plan. Native account SAML SSO is included at no extra charge. See pricing for plan details.
- The Owner or Admin role in Hyperping. Only these two roles can configure authentication settings.
- Admin access to your JumpCloud organization.
Hyperping values used during setup
JumpCloud asks for two Hyperping URLs. Both are shown in the setup wizard, and they are the same for every account:
| JumpCloud field | Value |
|---|---|
| SP Entity ID | https://api.hyperping.io/saml/sp |
| ACS URL | https://api.hyperping.io/saml/acs |
Step 1: Open the JumpCloud wizard in Hyperping
Go to MembersAuthentication and click Configure on the JumpCloud card.
The wizard stays open while you work in JumpCloud. Each step below matches a step in the wizard.
Step 2: Create the SAML application
- Add a custom application
In the JumpCloud Admin Console, go to SSO Applications and click + Add New Application, then pick Custom Application.
- Enable SAML
Check Manage Single Sign-On (SSO) and Configure SSO with SAML, then click Next.
- Name and save
Set the Display Label to "Hyperping" and click Save Application.
Step 3: Fill in the service provider settings
- Enter the Hyperping values
Open the application's SSO tab. Set SP Entity ID to
https://api.hyperping.io/saml/spand ACS URL tohttps://api.hyperping.io/saml/acs. Leave the IdP Entity ID as the value JumpCloud generates, Hyperping reads it automatically from the metadata URL. - Set the signing options
Under Sign, select Assertion, and check Declare Redirect Endpoint. Click Save.
Step 4: Map the SAML attributes
Still in the SSO tab, add these user attribute mappings. Note that the JumpCloud attribute names are lowercase:
| Service Provider Attribute Name | JumpCloud Attribute Name |
|---|---|
email | email |
firstName | firstname |
lastName | lastname |
Step 5: Assign user groups
Open the application's User Groups tab, select the groups that should reach Hyperping, and click Save. Users outside these groups get a JumpCloud error before ever reaching Hyperping.
Step 6: Copy the metadata URL into Hyperping
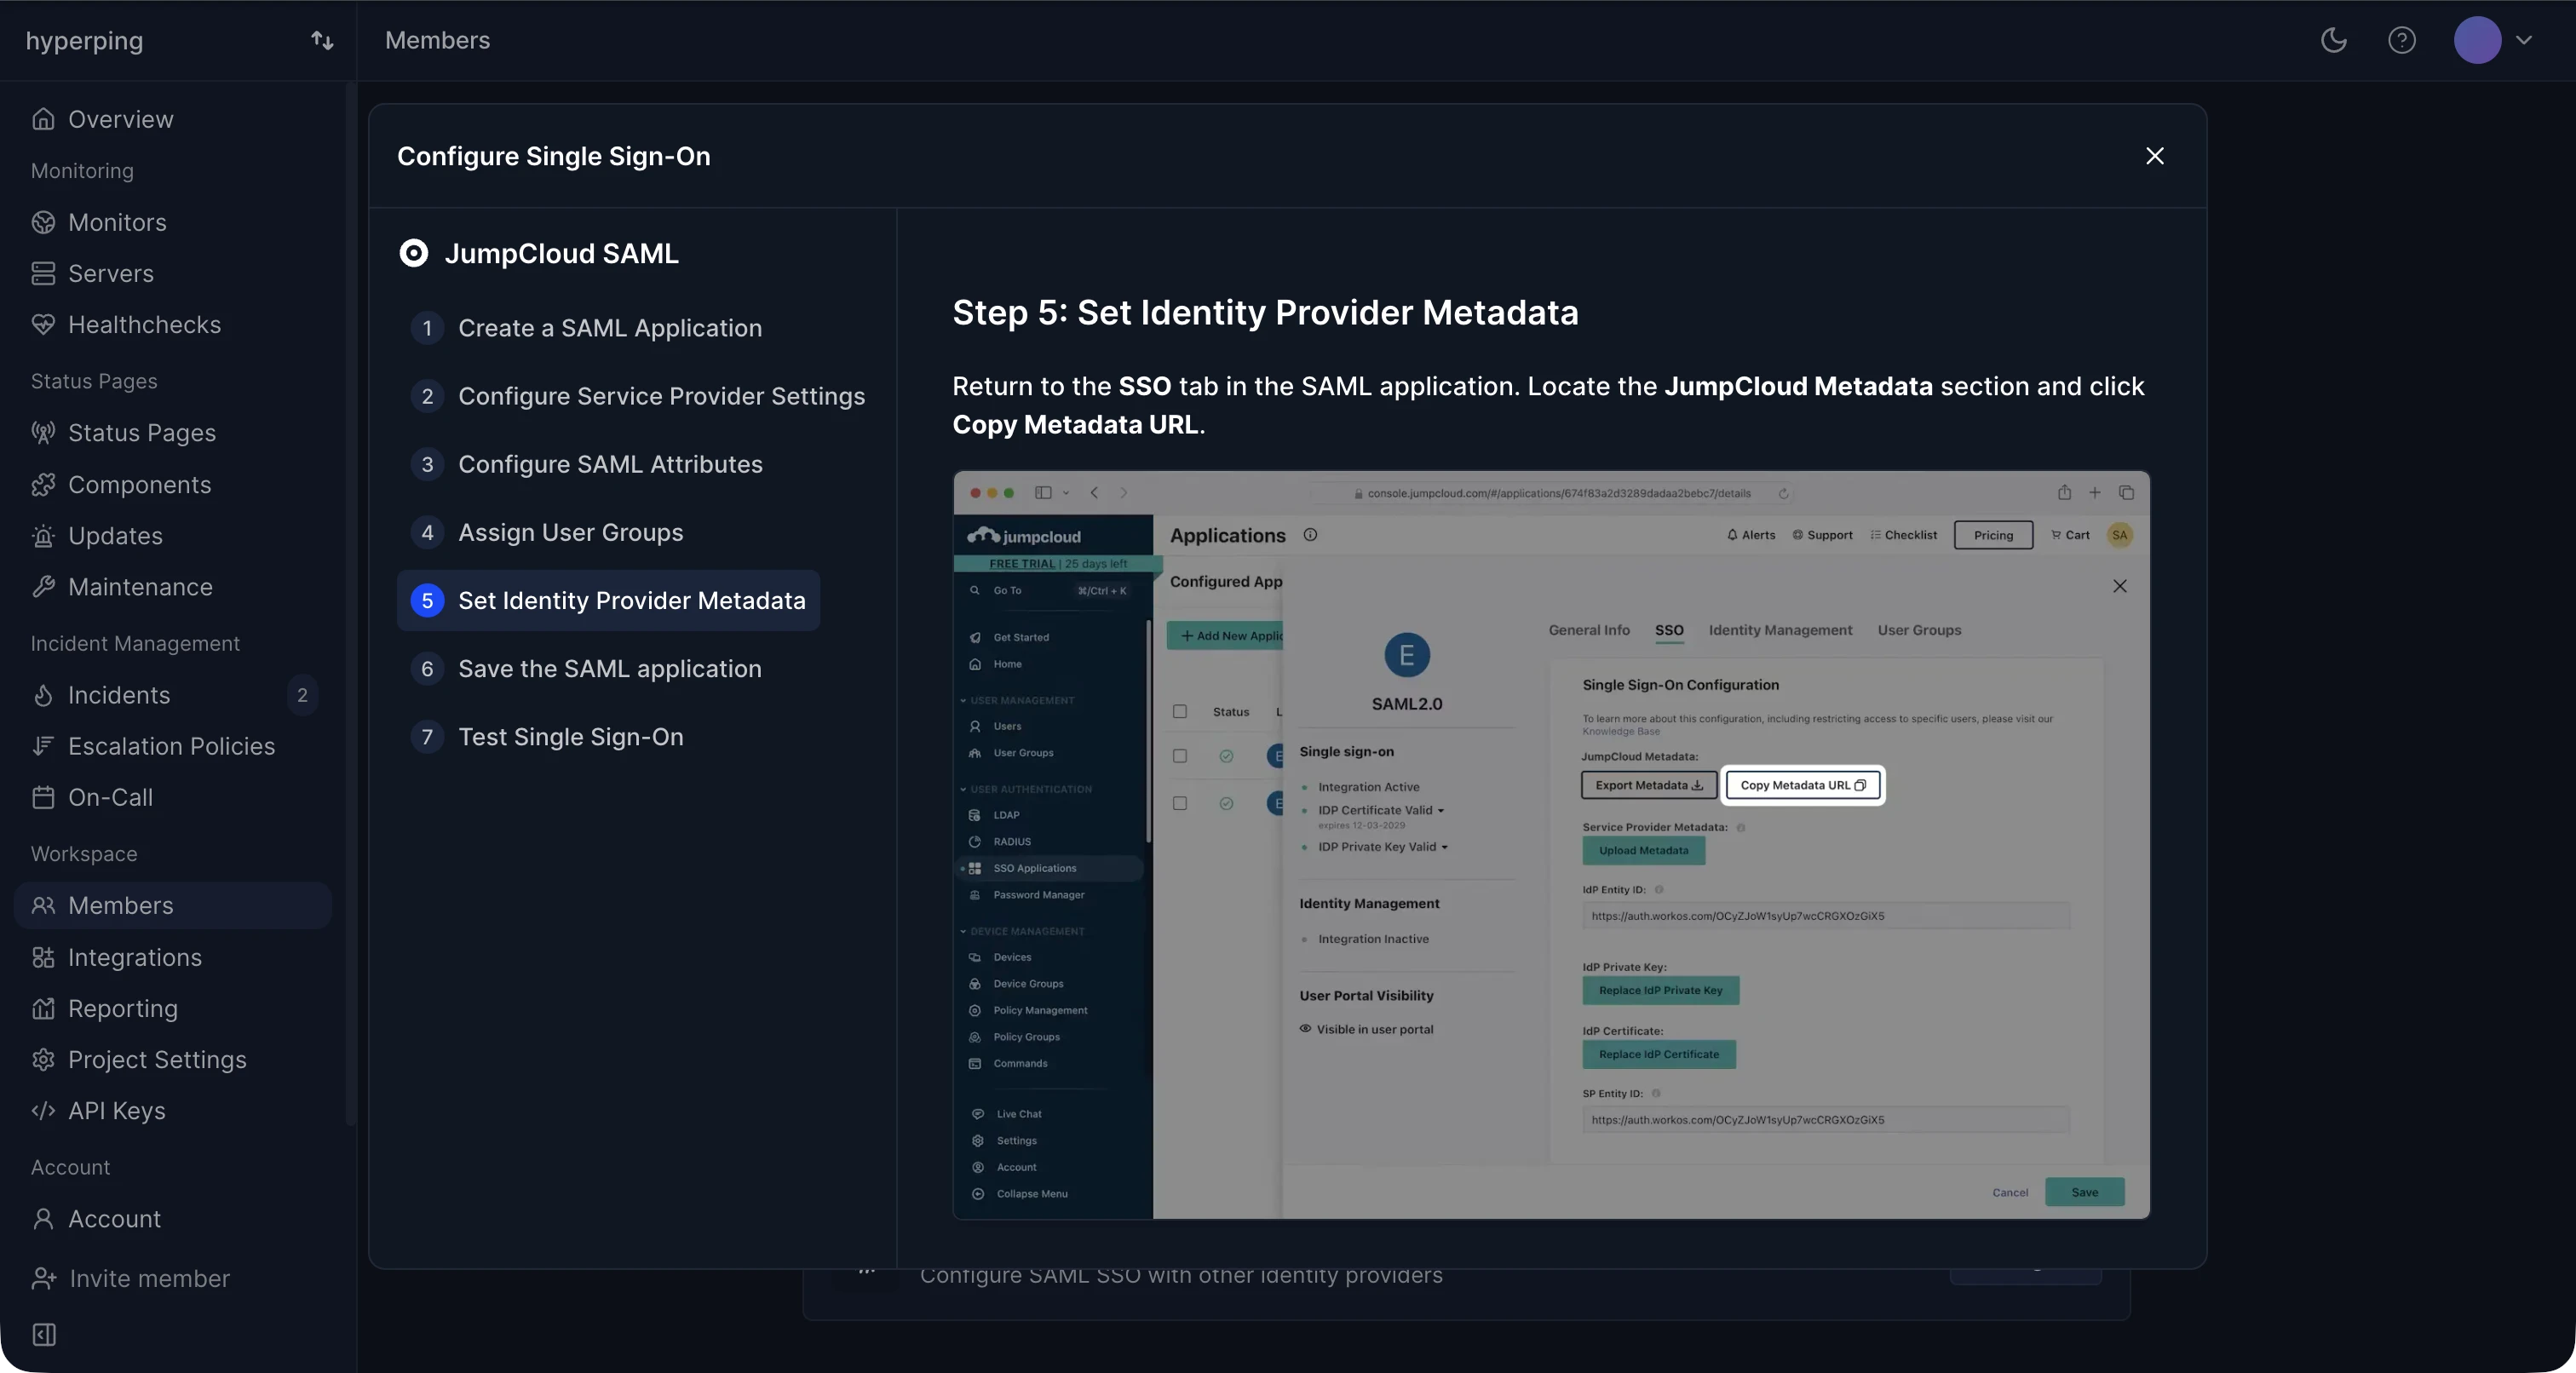
- Copy the metadata URL
In the SSO tab, find JumpCloud Metadata and click Copy Metadata URL.
- Paste it into Hyperping
In the wizard, paste the URL into Identity provider metadata URL. Hyperping fetches the SSO URL, issuer, and signing certificate from it.
- Add your allowed email domains
Enter the email domains your teammates use, for example
yourcompany.com. Hyperping uses the domain to route login attempts to this connection.
Click Save in JumpCloud once everything is in place.
Step 7: Test the connection
Back in the wizard, click Test Connection. A popup runs a real login against JumpCloud. Once you see Connection successful, click Complete Setup.
Troubleshooting
The test login fails with "user not found"
Your provisioning policy is Invite-only and the JumpCloud user has no Hyperping invite yet. Invite them from the Teammates page first, or switch provisioning to Request access or Auto-provision.
JumpCloud rejects the login before Hyperping loads
The user is not in a group assigned to the application. Check the User Groups tab.
The assertion is rejected by Hyperping
Make sure Sign is set to Assertion in the SSO tab. Hyperping validates the assertion signature against the certificate from your metadata URL.