Set up SAML SSO with Google Workspace
Let your team sign in to Hyperping through Google Workspace. You add a custom SAML app in the Google admin console, exchange metadata with Hyperping, and run a test login.
Prerequisites
- A Hyperping Pro or Business plan. Native account SAML SSO is included at no extra charge. See pricing for plan details.
- The Owner or Admin role in Hyperping. Only these two roles can configure authentication settings.
- Super admin access to your Google Workspace domain.
Hyperping values used during setup
Google asks for two Hyperping URLs. Both are shown in the setup wizard, and they are the same for every account:
| Google field | Value |
|---|---|
| ACS URL | https://api.hyperping.io/saml/acs |
| Entity ID | https://api.hyperping.io/saml/sp |
Step 1: Open the Google Workspace wizard in Hyperping
Go to MembersAuthentication and click Configure on the Google Workspace card.
The wizard stays open while you work in the Google admin console. Each step below matches a step in the wizard.
Step 2: Add the custom SAML app
- Open the Google admin console
Sign in to the Google admin console and go to Apps → Web and Mobile Apps.
- Create the app
Click Add App → Add custom SAML app, name it "Hyperping", and click Continue.
Step 3: Download the metadata and upload it to Hyperping
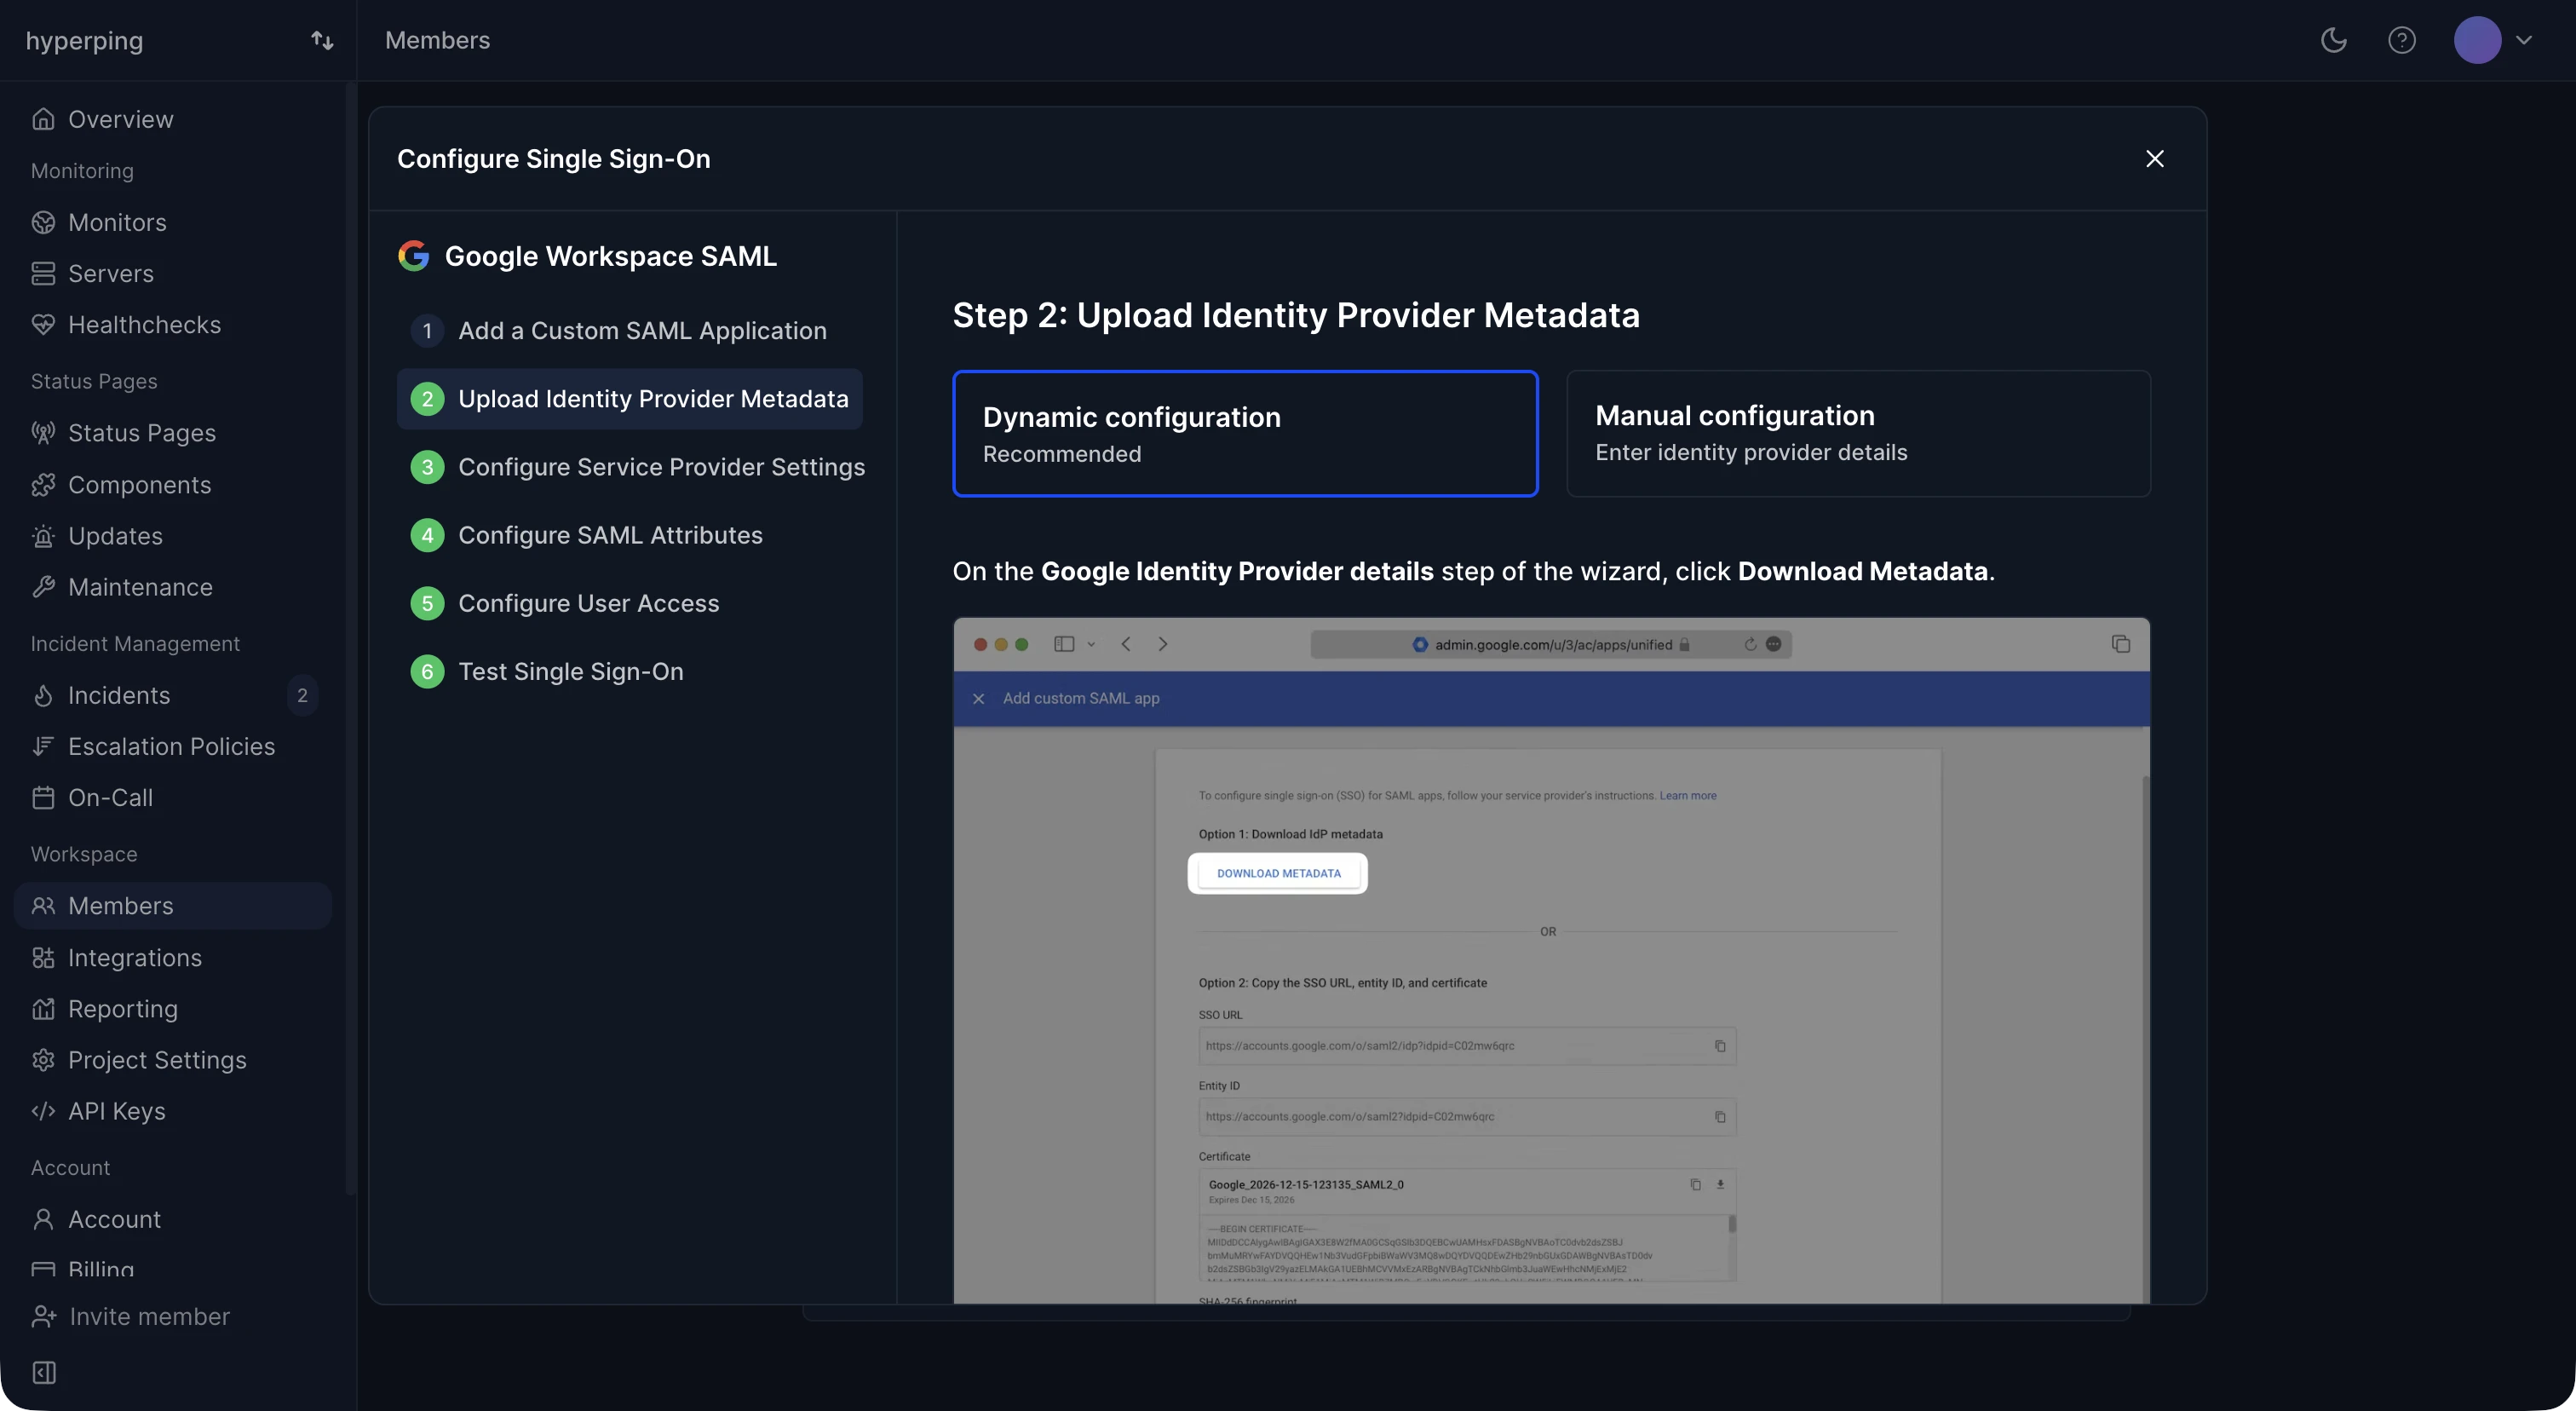
Google shows its identity provider details right after you create the app. Unlike other providers, Google gives you a metadata file to download instead of a metadata URL.
- Download the metadata
On the Google Identity Provider details screen, click Download Metadata.
- Upload it to Hyperping
In the wizard, keep Dynamic configuration selected and upload the file under XML Metadata File.
If you prefer Manual configuration, copy the Identity provider Single Sign-On URL and Identity provider issuer from the same screen, and upload the X.509 certificate.
Step 4: Fill in the service provider details
Back in Google, on the Service provider details screen, set ACS URL to https://api.hyperping.io/saml/acs and Entity ID to https://api.hyperping.io/saml/sp, then continue.
Step 5: Map the SAML attributes
On the attribute mapping screen, add these three mappings and click Finish:
| Google Directory attribute | App attribute |
|---|---|
| Primary email | email |
| First name | firstName |
| Last name | lastName |
Step 6: Turn on user access
- Enable the app
In the app's page, open User Access, click View details, set the service to ON for the right organizational units, and click Save.
- Add your allowed email domains
In the Hyperping wizard, enter the email domains your teammates use, for example
yourcompany.com. Hyperping uses the domain to route login attempts to this connection.
Step 7: Test the connection
Back in the wizard, click Test Connection. A popup runs a real login against Google. Once you see Connection successful, click Complete Setup.
Troubleshooting
The test login fails with "user not found"
Your provisioning policy is Invite-only and the Google user has no Hyperping invite yet. Invite them from the Teammates page first, or switch provisioning to Request access or Auto-provision.
Google shows app_not_enabled_for_user
The app is still OFF for the user's organizational unit, or the change has not propagated yet. Check User Access in the admin console and wait a few minutes.
Login worked, then broke months later
Google SAML certificates expire and cannot be refreshed from a URL. Download the new metadata file from the admin console and upload it again in the Hyperping wizard.