How to edit a monitor
Change a monitor's name, URL, request headers, or any other check setting without recreating it. Everything lives in the monitor's Settings tab.
Open the monitor settings
- Open the monitor
From your dashboard, click the monitor you want to edit.
- Go to the Settings tab
Adjust the name, URL, check interval, regions, IP version, and HTTP options, then save.
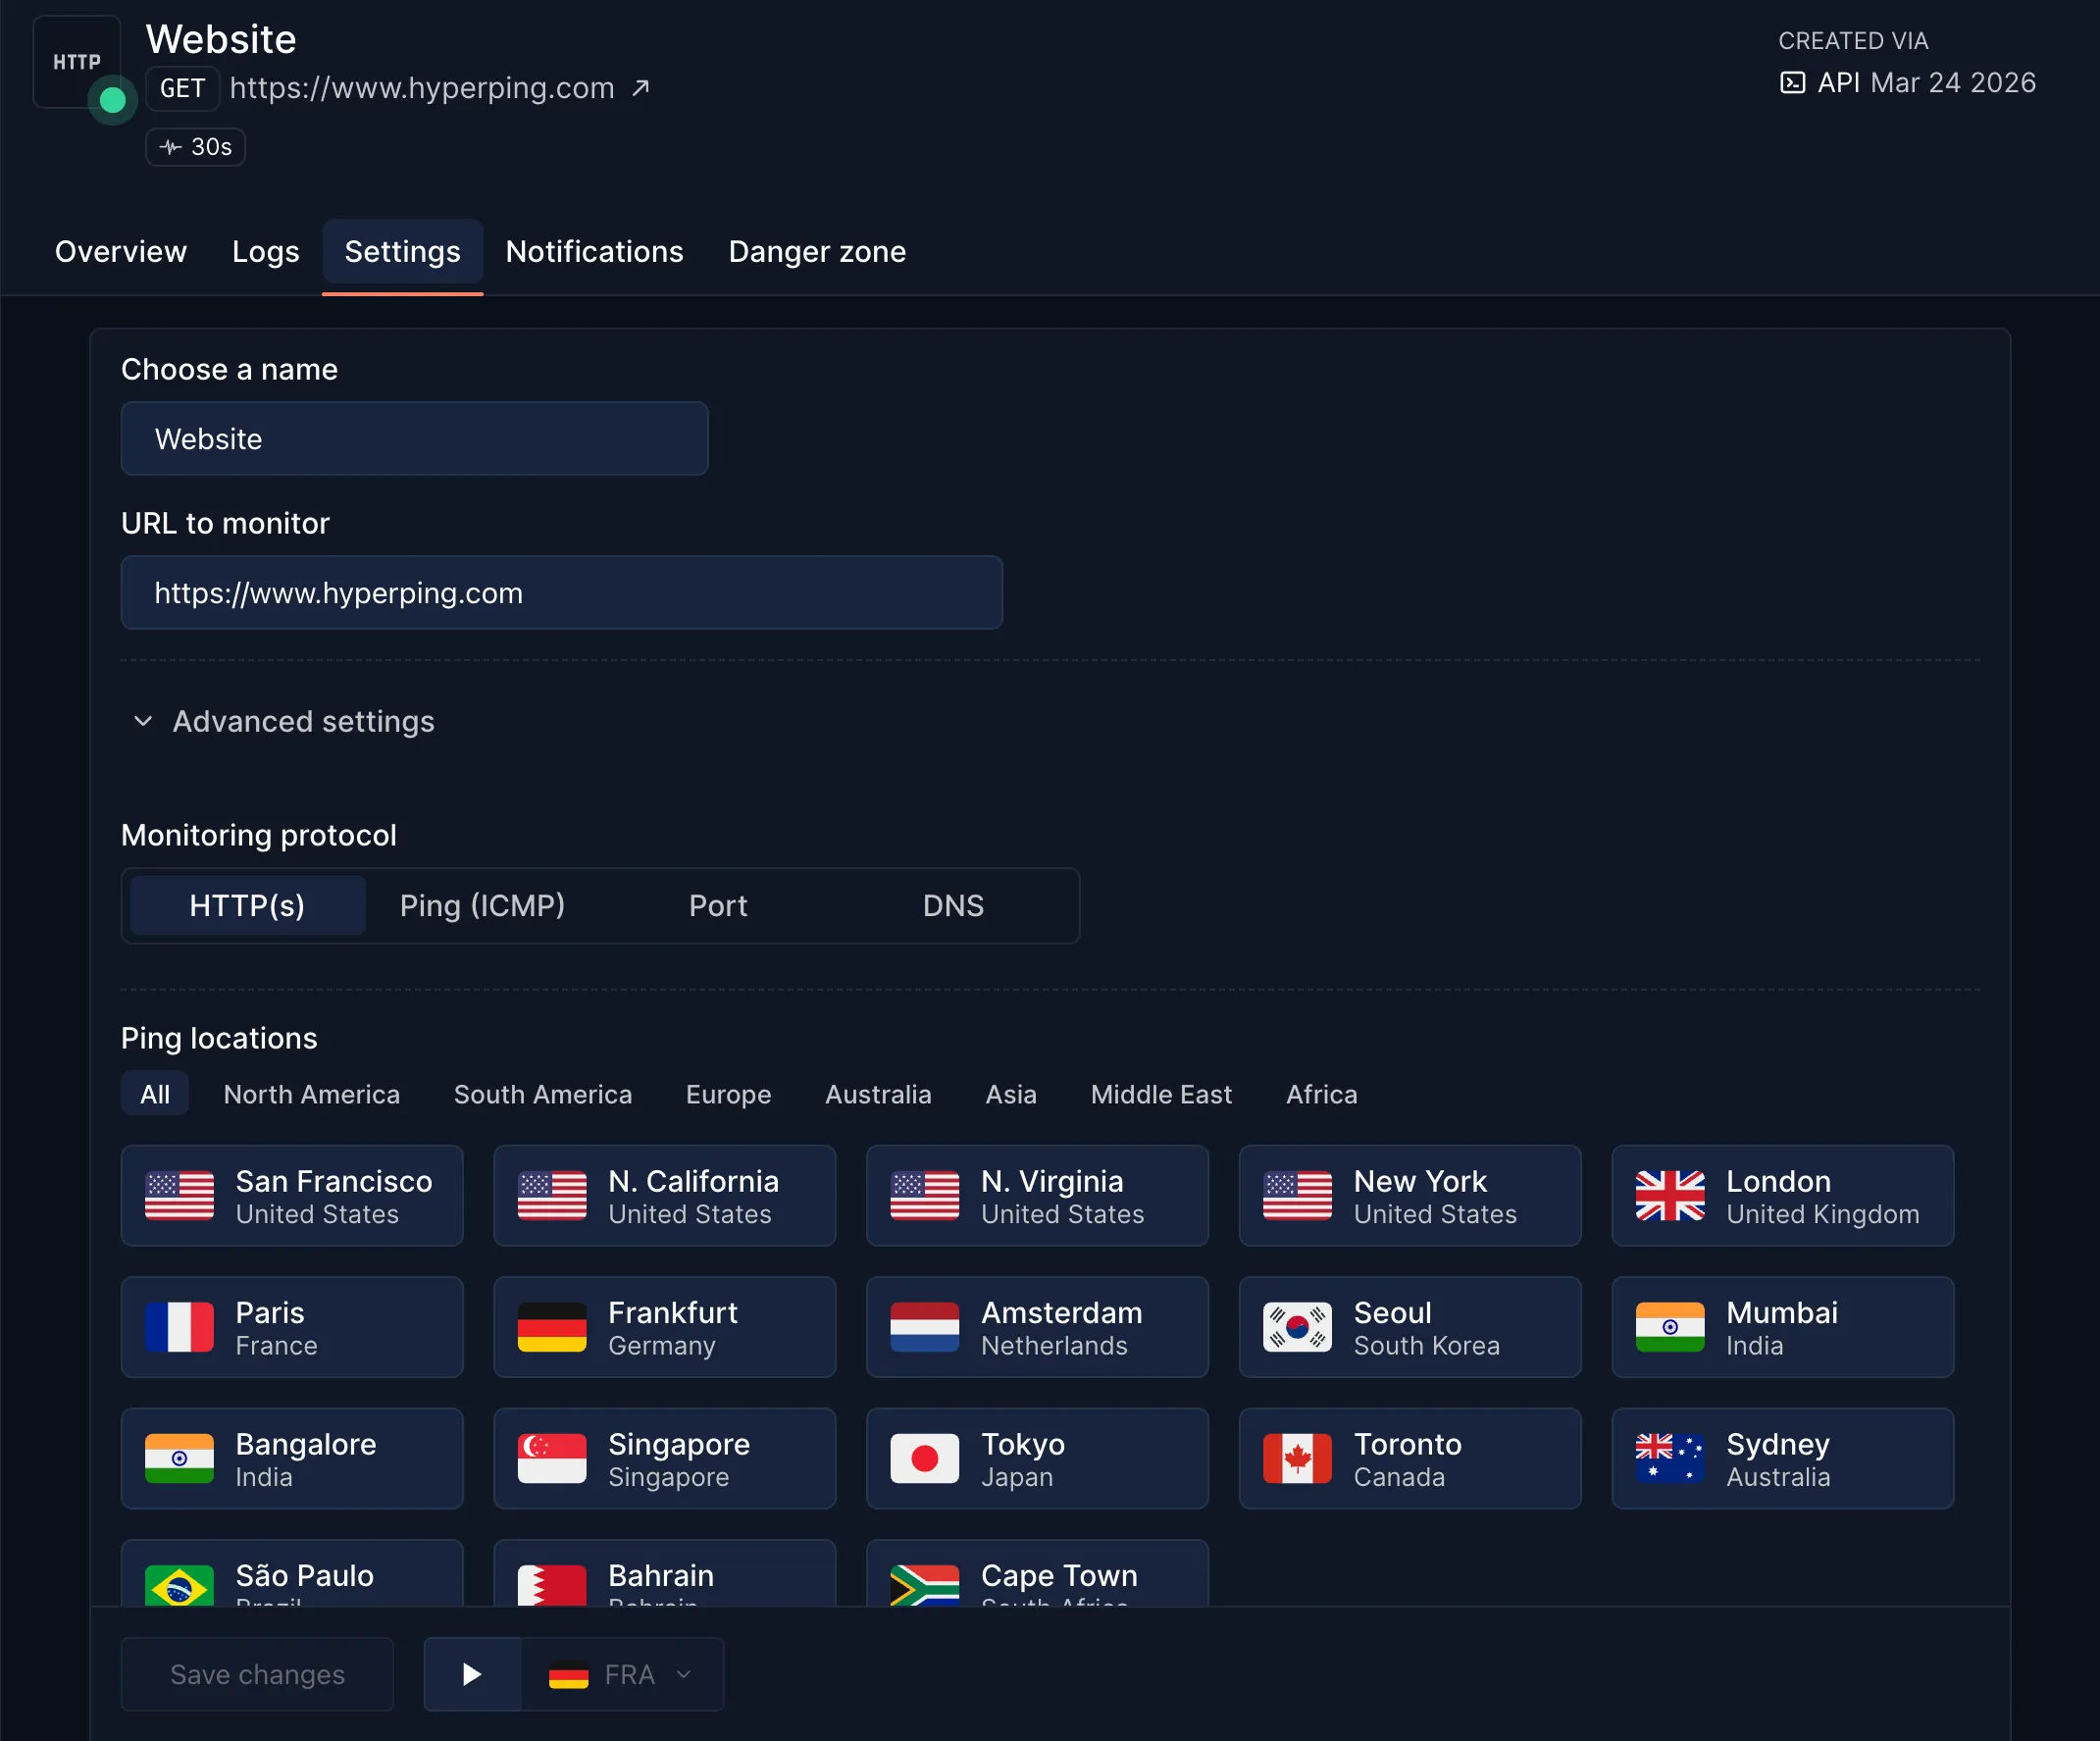
See Create a monitor for what each parameter does.
Change when alerts trigger
By default, you are alerted as soon as a downtime is confirmed. If you prefer to ignore short blips, add a delay: open the monitor's Notifications tab and set how long the check must stay down before you are notified.
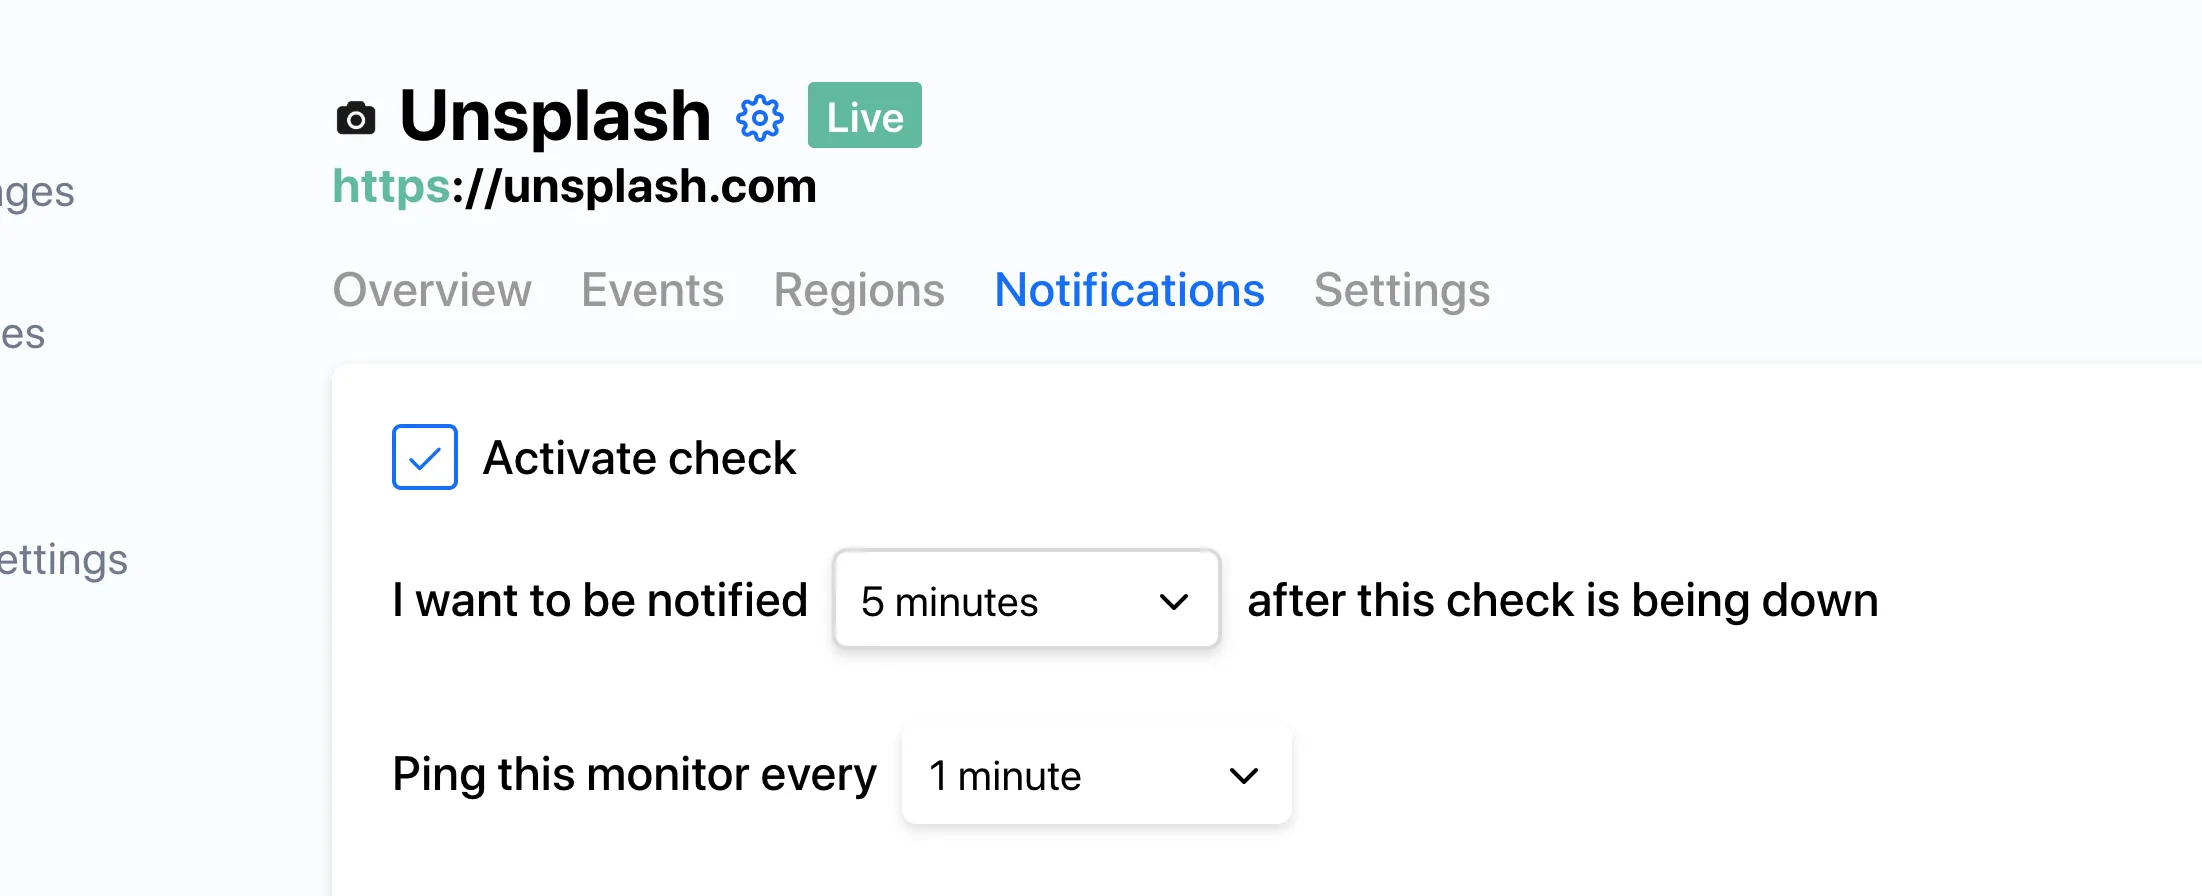
For example, with a 5 minute delay, a downtime that recovers after 2 minutes will not trigger any alert.
Edit via the API
Every setting is scriptable with a PUT on the monitor. The alert delay is the alerts_wait field, in minutes, and -1 disables alerts entirely.
curl -X PUT https://api.hyperping.io/v1/monitors/mon_3GhAQMYGEQuyUH \
  -H "Authorization: Bearer ${API_TOKEN}" \
  -H "Content-Type: application/json" \
  -d '{
    "name": "Website",
    "url": "https://acme.com",
    "regions": ["paris", "frankfurt", "amsterdam", "london"],
    "http_method": "GET",
    "check_frequency": 30,
    "request_headers": [
      { "name": "X-Request-Header", "value": "Header value" }
    ],
    "protocol": "http"
}'Response200 OK
{
  "name": "Website",
  "url": "https://acme.com",
  "paused": false,
  "regions": ["paris", "frankfurt", "amsterdam", "london"],
  "http_method": "GET",
  "check_frequency": 30,
  "protocol": "http",
  "follow_redirects": true,
  "ip_version": 4,
  "expected_status_code": "2xx",
  "uuid": "mon_3GhAQMYGEQuyUH",
  "status": "up",
  "ssl_expiration": 90,
  "alerts_wait": 0
}
Full field reference in the Update monitor API.