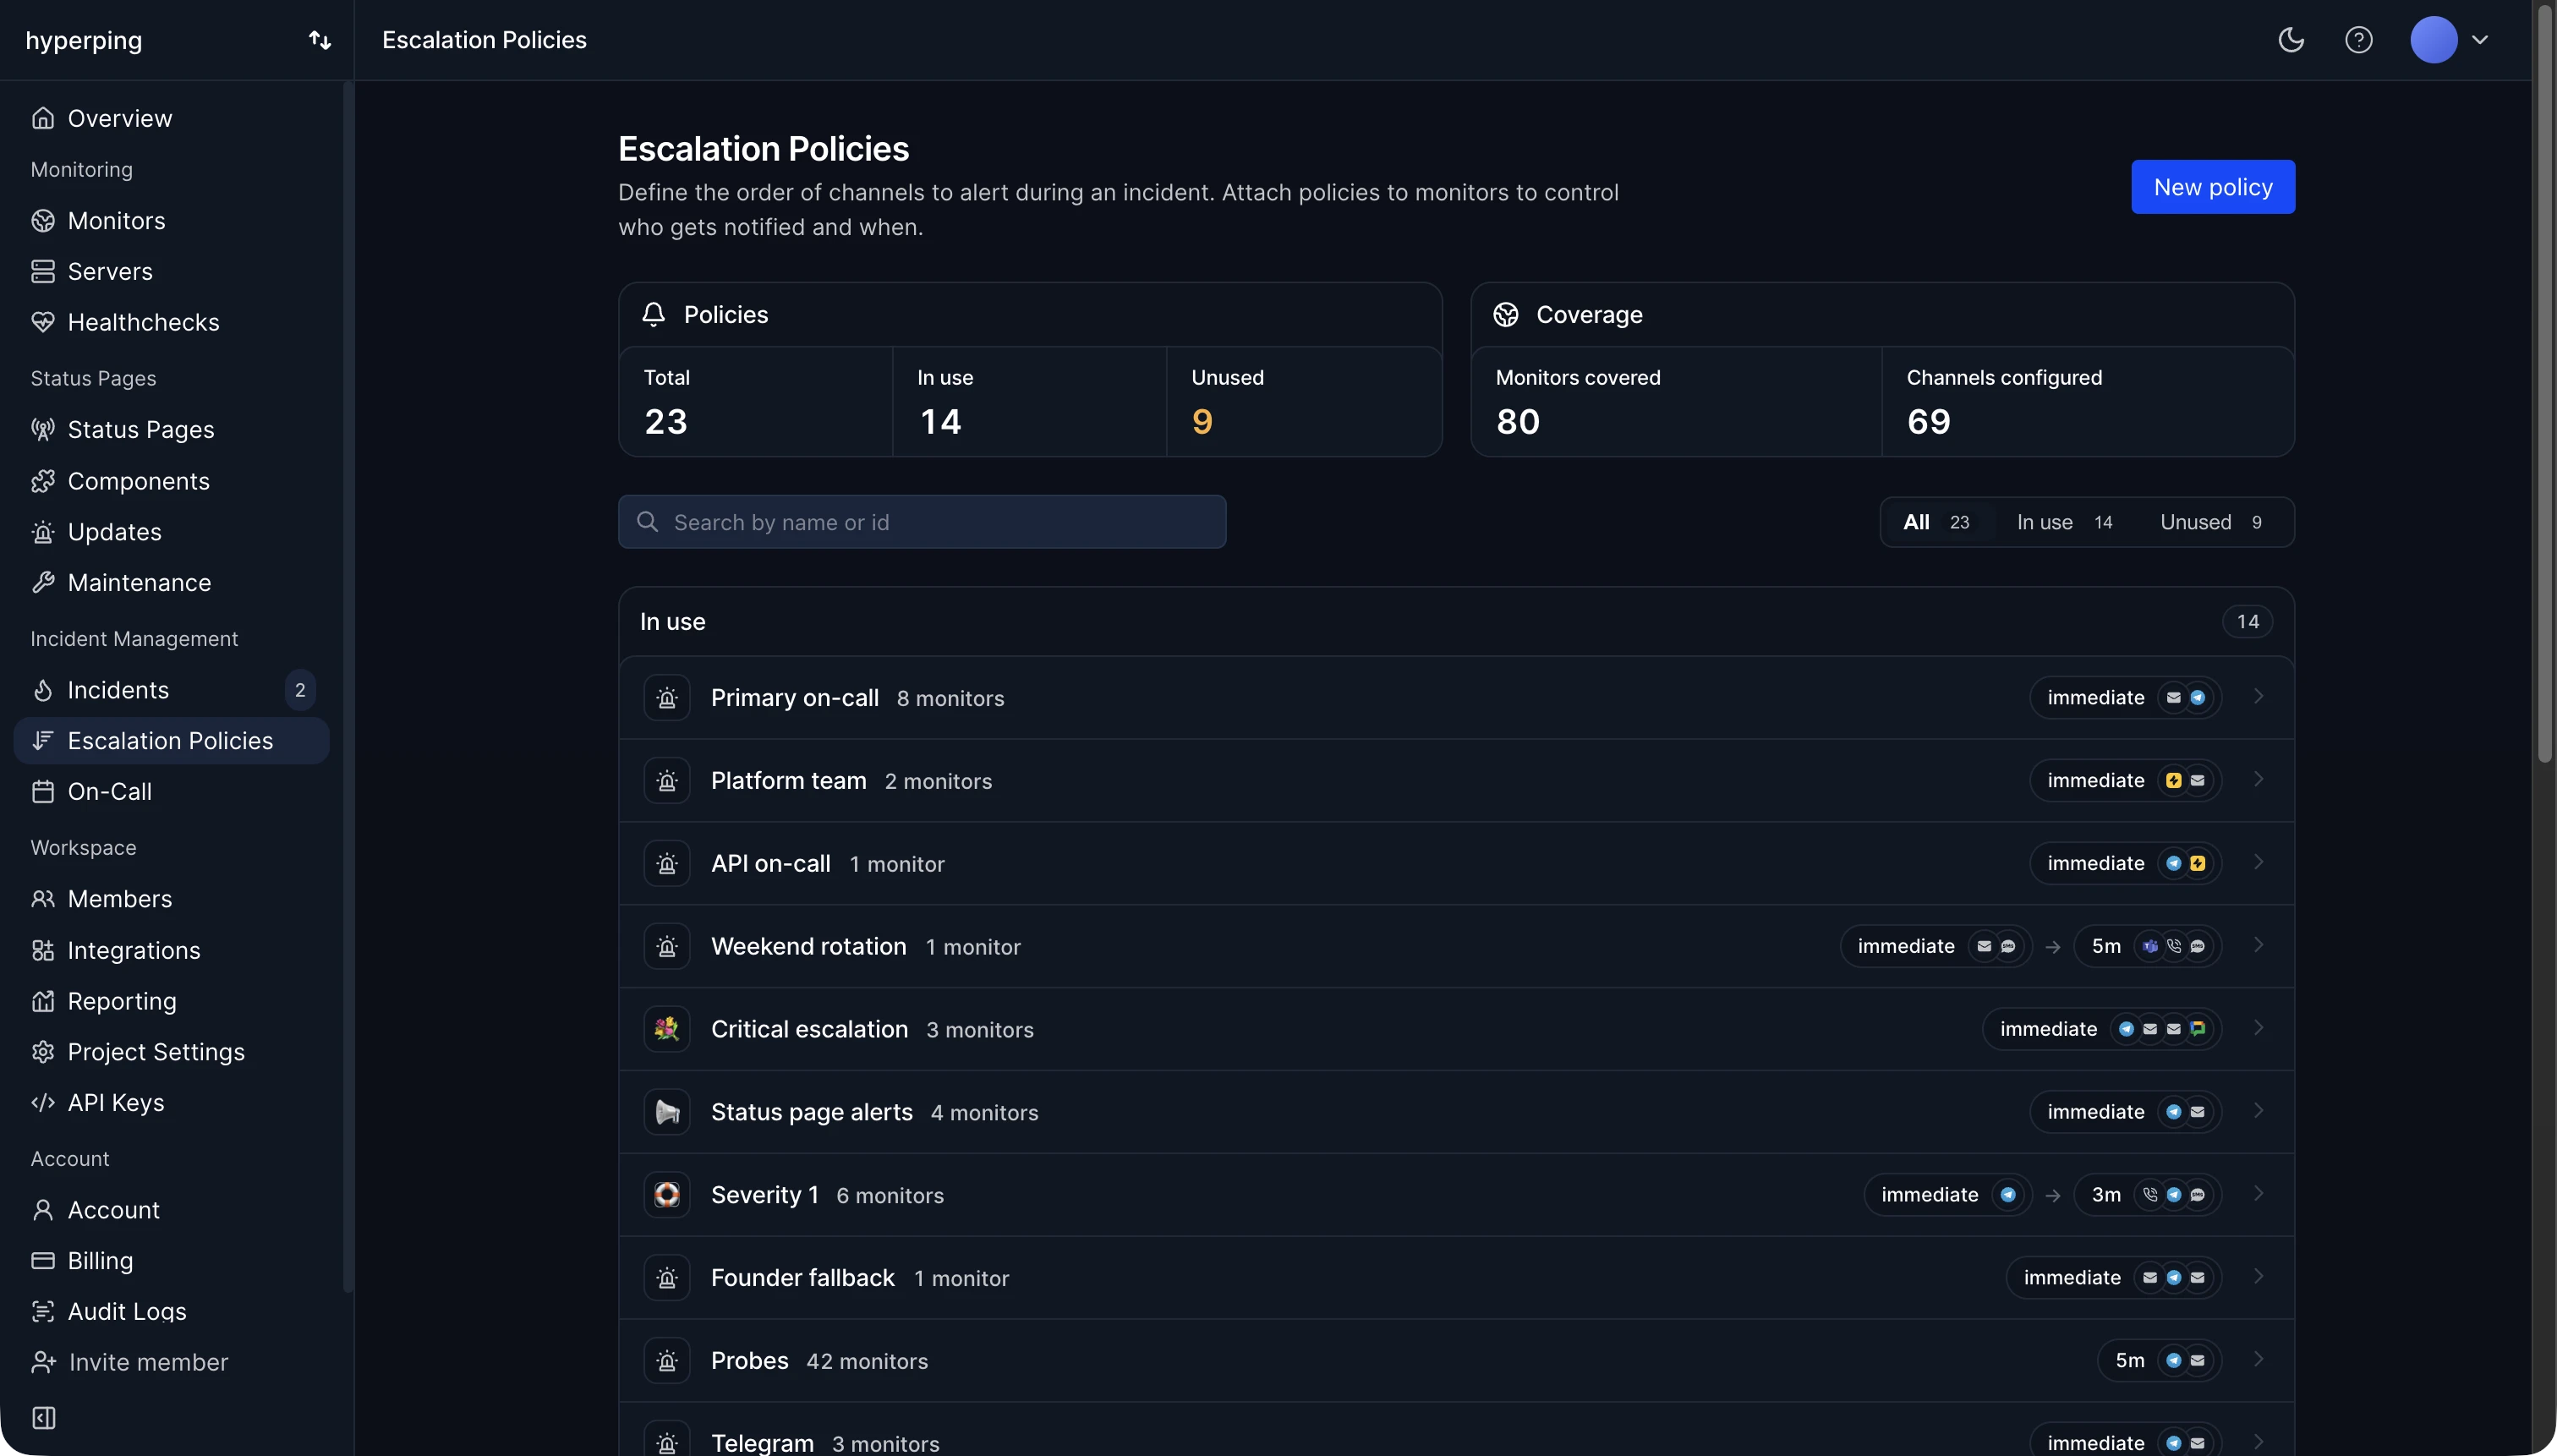
Escalation policies
Route alerts through the right channels in the right order when an incident occurs. Instead of paging every channel at once, define a sequence of steps with delays: if a step does not lead to acknowledgment, the next one triggers automatically.
Escalation policies are useful when:
- You want Slack notifications first, then SMS or phone calls if no one responds
- Different people need to be contacted at different stages of an incident
- You have on-call rotations and want alerts sent to whoever is currently on duty
- You need to reduce alert noise while still making sure critical issues get attention
Create an escalation policy
- Open Escalation Policies
Go to Escalation Policies in the sidebar and click New escalation policy.
- Name the policy
Give it a descriptive name, for example "Production Critical" or "Business Hours".
- Configure your first escalation step
Set the delay and pick the notification channels for the first step. The settings are detailed in the next section.
- Save
Click Save at the top-right when you are done.
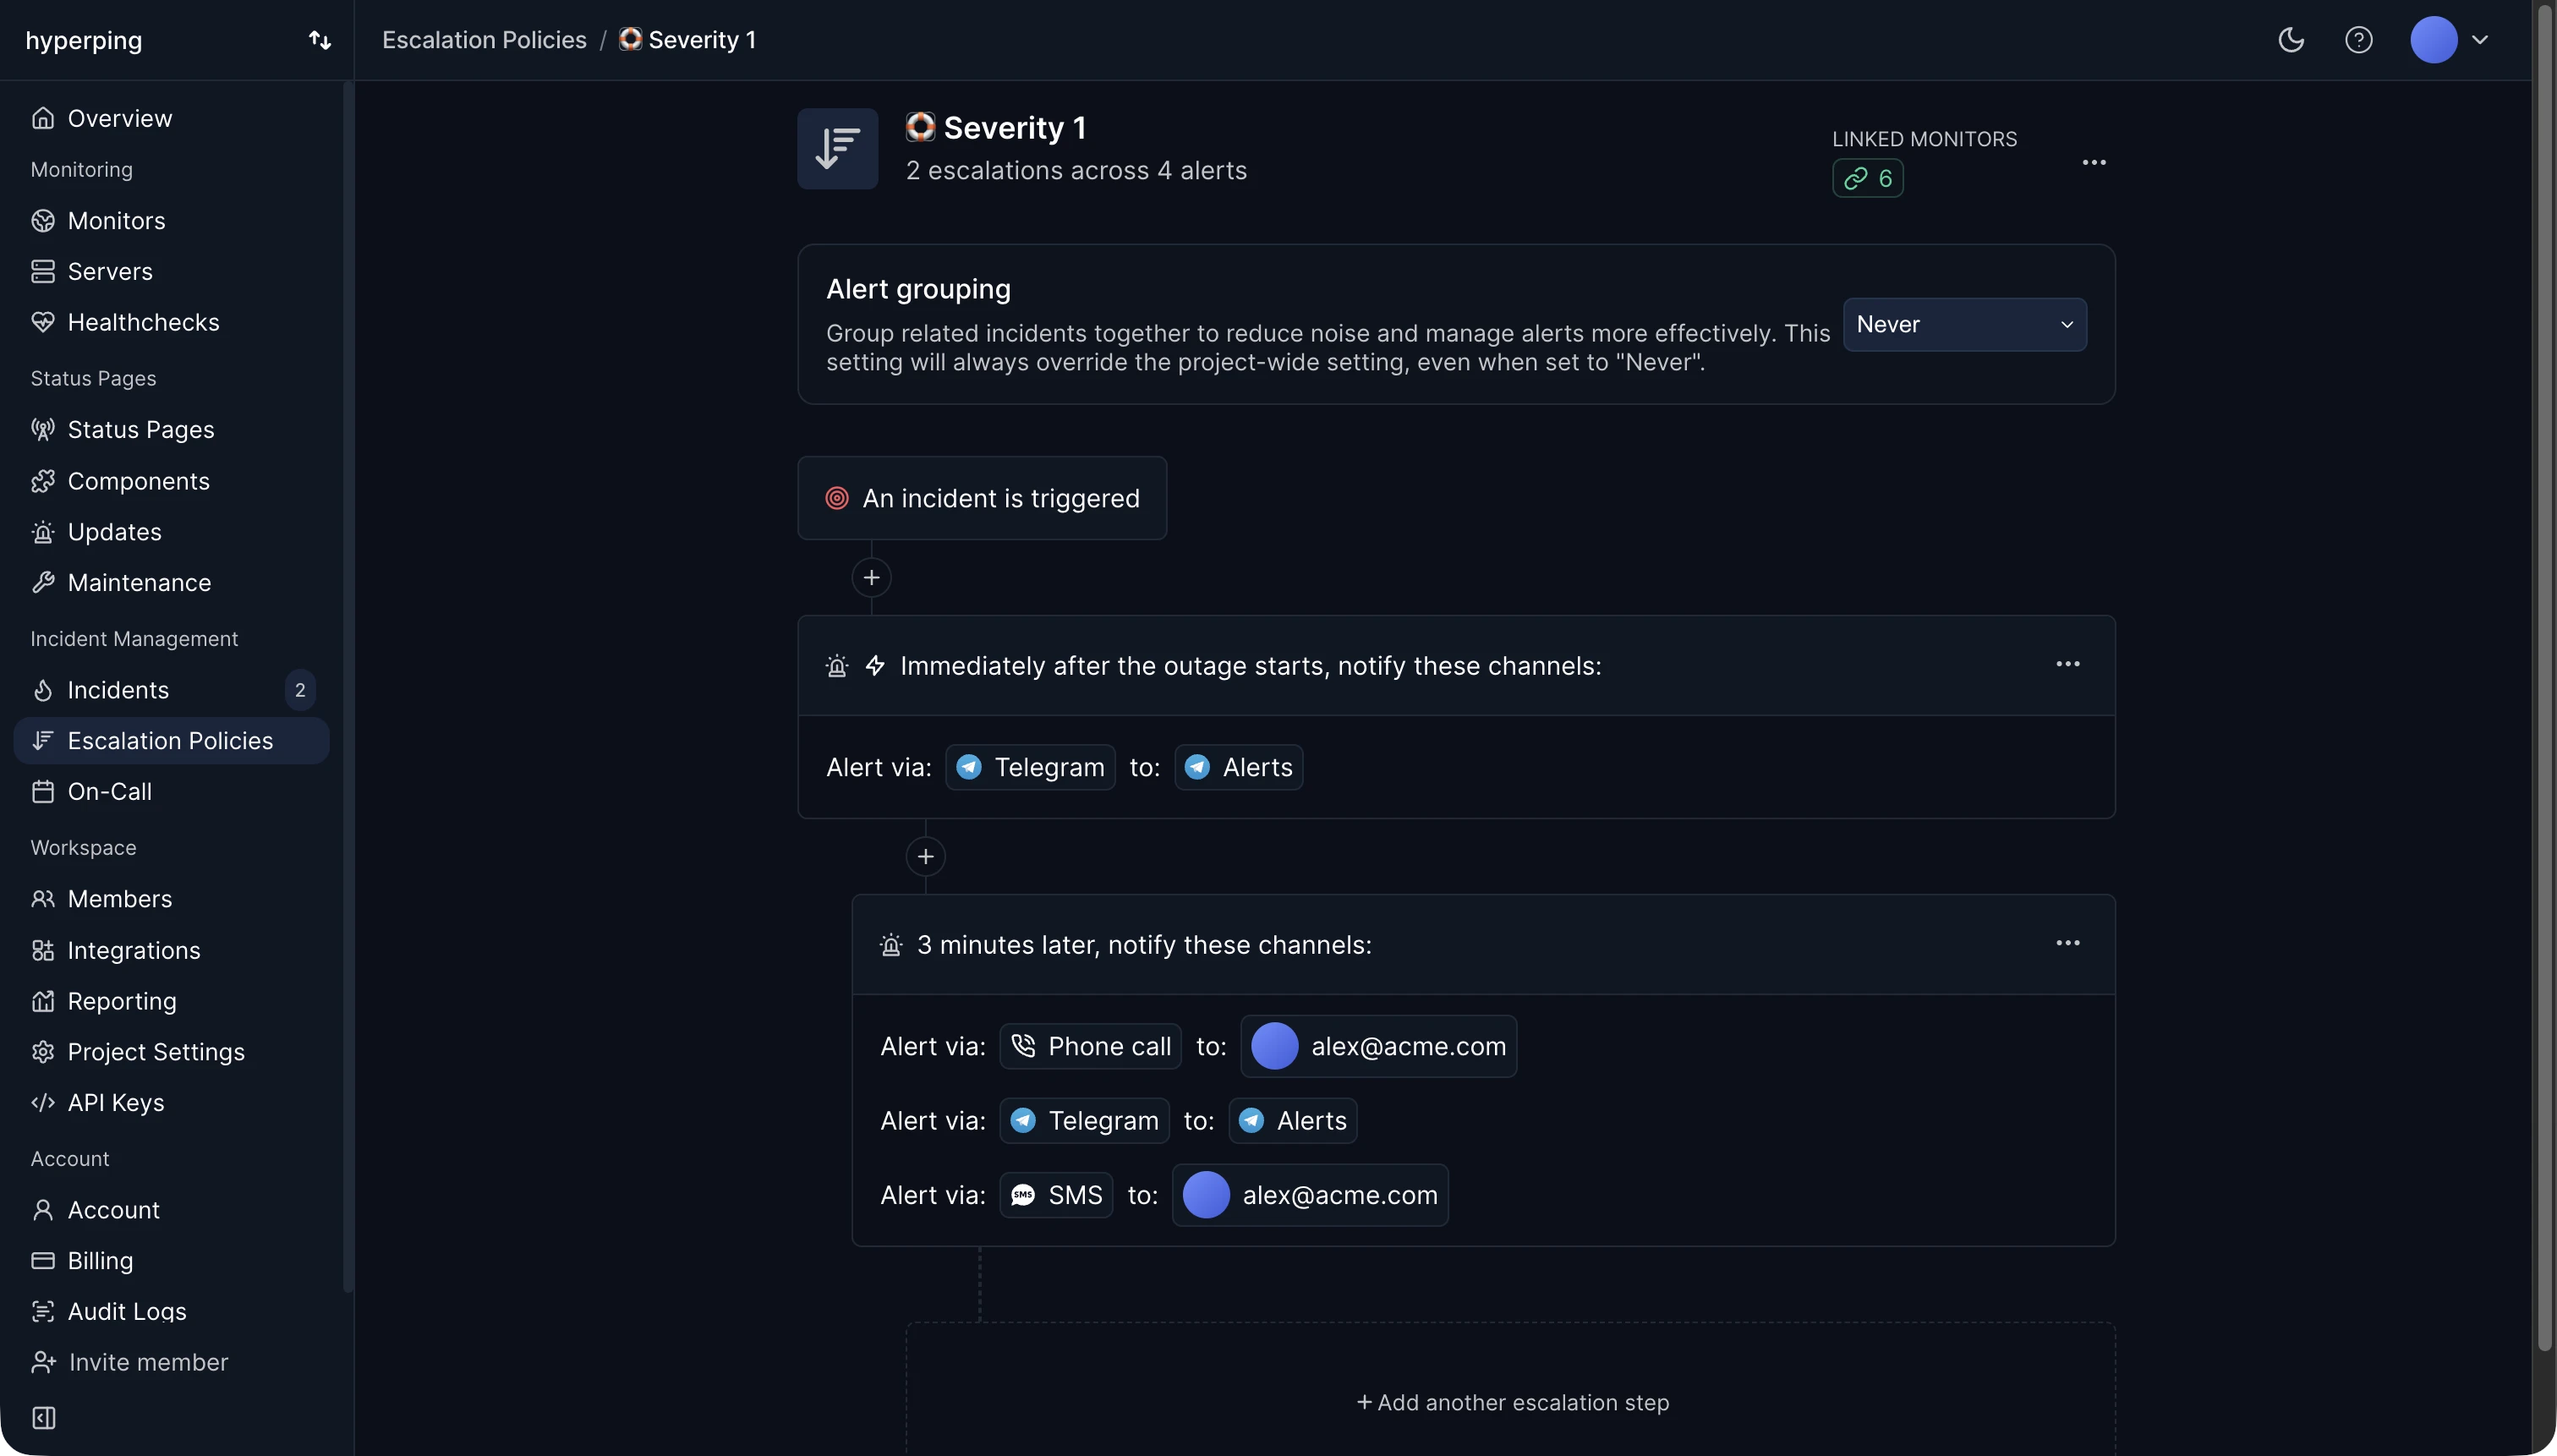
Configure escalation steps
Each escalation policy consists of one or more steps. A step defines which channels receive alerts and how long Hyperping waits before moving to the next step.
Set the delay
Set the delay in minutes for when the step triggers. A delay of 0 means the step fires instantly when the incident starts. For the second step onward, the delay is counted from the previous step.
Add notification channels
You can add multiple channels to a single step. When the step triggers, all channels in that step receive the alert at the same time. Available channels include email, SMS, phone call, Slack, Microsoft Teams, and any other configured integrations.
For email, SMS, or phone call notifications, you can select individual recipients or use the "Everyone" option to notify all teammates in the project.
Add more steps
Click + Add another escalation step at the bottom of the policy. Each additional step acts as a fallback if the incident is not yet resolved after the previous step's delay.
Use on-call schedules
For email, SMS, or phone call notifications, you can select an on-call schedule instead of a specific recipient. This sends alerts only to the team member who is actively on-call at the time of the incident.
On-call schedules appear in the recipient dropdown under the On-Call Schedules section when configuring these notification types. For more details, see the On-call documentation.
Assign a policy to a monitor
- Open the monitor
Go to a monitor's detail page.
- Go to the Notifications tab
Alert settings for that monitor live here.
- Select the policy
Pick an escalation policy from the Escalation Policy dropdown.
Example setup
- Step 1, at 0 minutes
Send a Slack message to the #incidents channel.
- Step 2, after 5 minutes
Send an SMS to the on-call engineer.
- Step 3, after 15 minutes
Call the engineering lead and send an email to the team.
This setup gives the team five minutes to respond in Slack before the alert escalates to SMS, and another ten minutes before triggering phone calls.
Troubleshooting
Alerts are skipping escalation steps
Check that the delay between steps is long enough. If the incident is resolved before the next step triggers, remaining steps are cancelled.
A teammate is not receiving alerts
Verify they are added as a recipient in the correct escalation step, or that they are part of the assigned on-call schedule. Also check that their notification channel (email, phone number) is configured in their account settings.
All channels still fire at once
Make sure the escalation policy is assigned to the monitor. Go to the monitor's Notifications tab and confirm a policy is selected.
